
🛠️ Purpose & Design Philosophy
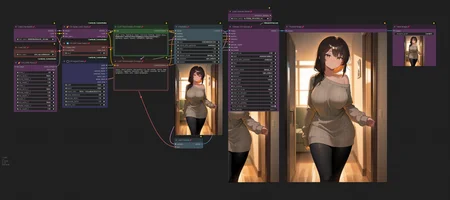
This workflow is a high-fidelity environment built for Illustrious. It prioritizes stability and professional texture over generation speed. It follows an "all-in-one" philosophy: configure your prompts, hit queue, and let the workflow handle the multi-stage refinement from start to finish.
Not for Speed: This is a heavy-duty refinement tool. If you want 2-second previews, use a basic workflow.
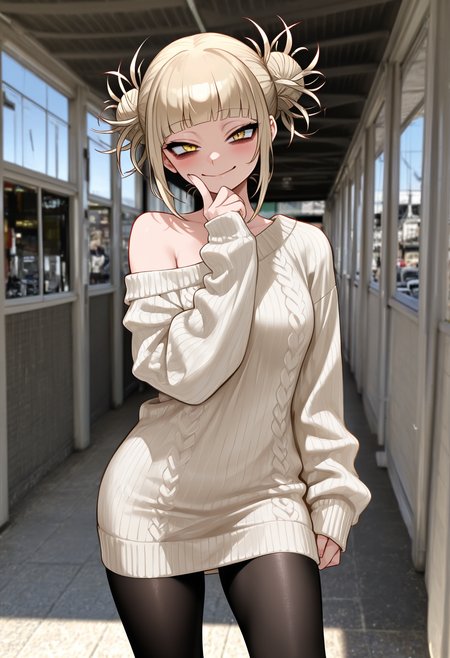
Personal Use: Built for my specific production needs. It is shared as-is for those who want a "set-and-forget" pipeline for Illustrious. Adjust the settings and models to fit your needs. The defaults on v19+ will be what I used for the sample images.
All-in-One Logic: The workflow handles generation, detailing, and upscaling in one continuous pass.
If you're needing something with more features: Try checking out Silly All-in-one, Multiple Characters With Regional Loras which is on civitai. I have no plans to implement additional features.
⚠️ Disclaimer & Compatibility
Install at Your Own Risk: Custom nodes can break your environment. I am not responsible for troubleshooting your specific installation.
ComfyUI: Built and tested on the non-app version. Desktop app users may face additional hurdles.
The "Your Version" Factor: Your node versions and environment are 99.9% likely to differ from mine.
Nodes 2.0: I do not recommend using Nodes 2.0. It creates unpredictable UI behavior; I will not provide support for issues involving this feature.
🤝 Support & Boundaries
I have not and never will monetize my workflow. CivitAI is the only platform I am maintaining this workflow on. If you find a version of my workflow posted and/or monetized anywhere and use it, then whoever posted it is responsible for providing you any support. This is the main reason why I don't monetize this: I don't want to be or feel obligated to provide support.
No DMs: DMs are disabled due to repeat spam. Please check the Discussions tab below; most questions have already been answered.
Modifications: You are free to hack this workflow apart. However, you are responsible for fixing it if it breaks.
Custom Requests: I do not make private workflows. If you need a custom solution, post a Bounty on CivitAI. There are many talented creators ready to help you for a fee.
Description
This is a "no-frills" workflow.
Basic Image Generation
Option to use up to 3 loras
Upscale via Ultimate SD Upscale.
Standard upscaling can be more complicated when using the normal "Upscale Image by" node. Why? Resolution varies depending on the upscale model. Using upscale by 2, for example, while using a 1x upscale model versus a 4x upscale model do not result in the same resolution. So in the name of "keeping it simple", but still having the upscale option I am using Ultimate SD Upscale.
The only custom nodes needed to download are ComfyUI_Comfyroll_CustomNodes and ComfyUI_UltimateSDUpscale.
FAQ
Comments (55)
Updated the file one more time. Removed the output path on the image saver node, so you can either use the default path or specify your own.
Easily and nice to use. I've added some other simple things that helped me a lot
- Fast Groups Bypasser (rgthree) - to easily turn off/on upscaling
- LoRA Info - simple and fast checking LoRA activation tags
- Face-Detailer - self-explanatory
If you have the "euler dy" or "euler dy negative" sampler, they do not appear to work with my workflow. Not sure how popular those samplers are. Seems they conflict with the SamplerCustomAdvanced node. Which is an intergal part of this workflow.
Will be updating workflow soon. CFG++SamplerSelect was updated and basically was outputting smeared images (for me). I had to remove the node completely and re-add it. Tested it against a previous image with same seed etc., and the results were slightly different from each other but still acceptable.
v1.8 has the new CFG++SamplerSelect node. The settings are already in place for what worked for me and seemed to give similar results as before. You can verify with the v1.8 changes if the settings did carry over to the workflow.
Awesome workflow, I can simply use it without any issues. I'd recommend adding inpaint or another editing program(if possible).
Thanks for the compliment and suggestion!
Fortunately, it is easy for folks to add whatever they like to existing workflows! My main goal with this workflow was to allow for good results (IMO) in a short time. I used to have a hand-fix portion included, but since Pony released, I haven't really had a need. The watermark removal portion is almost not needed anymore, but I do still run into those here and there.
I think if I were to add inpainting, it would start to make this workflow more complicated than it is for new comfy users. I get quite a few questions already, so I would like to keep it simple as possible.
@Gladas That's very valid, thanks again for your workflow, I'll continue to add more to mine!
Great job! ControlNet Version Plz.
Hey there, thanks for the compliment! My main goal with this workflow is to get good results in a short amount of time without making it overly complicated.
Unfortunately, I do not use ControlNet any longer and my knowledge of it is probably out-of-date. If you already are using a workflow with ControlNet, it should be easy to copy/paste that into this workflow.
Edit: I am playing around to ttplanet's tile for controlnet. I did use this some time ago. If it helps reduce artifacts in USDU, like random faces appearing, I may add it to the workflow. Anything beyond that though, is probably out of my scope of knowledge.
I got everything else working, but every time I gen I get this
" TTPlanet_Tile_Preprocessor_Simple
name 'apply_gaussian_blur' is not defined "
yeah, someone else ran into that too, not sure what causes it tbh. That specific error points to the tile preprocessor node based on the wording.
You can try reaching out to the author of the tile preprocessor node or just use v1.8 instead.
The only other thing I can think (but don't recommend) is updating comfy and making sure all your python dependencies are updated too.
The problem lies currently within the github project "TTPlanetPig / Comfyui_TTP_Toolset". In one commit the function called "apply_gaussian_blur" was removed, although is is still used in the project. the workaround is described in Issue#15. It mentions to restore a function. To do this you have to manually edit one file in the comfyuifolder, save it and restart comfyui. I've checked the code in the issue, it's the exact same code that was deleted before. With that fix, the workflow is running fine for me currently.
@Catastrophy nice, I haven't done anything on my end, so maybe I am just getting lucky in not encountering that issue. Thanks for sharing the info!
@Catastrophy thanks will check that out when my new GPU comes fried my old one by mistake lol my fault,
any chance we can get a image2image version of this workflow? amazing workflow none the less
I was actually asked about this before and the results were not as expected for the person who tried it out. I recommended lowering the denoise, but never heard back from them after. I can maybe try it out on my own and see how it goes. When I tried it before, it worked fine for me, but bad for them lol
@Gladas would be great if you could share a i2i version of this, i only moved to comfy from webui 2 days ago so i have 0 clue on how to build workflows even tho i have a ton of experience from a user standpoint when it comes to sd :<
@yiqijiu by image to image you mean taking an existing image and feeding into this workflow correct? If you are just wanting to use the upscale portion for an existing image, all you would have to do pretty much is delete the first sampler, replace it with a Load Image node and feed it into the USDU node.
I am working on an IMG2IMG workflow that would feed an existing image into the full workflow. So basically you would have to toggle if you want to just generate like normal or do IMG2IMG. This was something I planned on doing for myself since I have some old images that I would love to run through current models.
@Gladas damn son you work fast, yeah thats exactly what i wanted/needed thanks my king
After using Automatic1111 a year ago and taking a break, only to come back to the sudden dominance of ComfyUI. This is by far the best workflow I've used from a complete ComfyUI beginner and user.
Glad it helped!
Every updated version provides great help to beginners like me. The i2i version solved the problem that I have been troubled with recently. Thank you again. It is a great workflow.
Hey there, glad to help and happy that you like it!
Hi, I'm having a problem using this workflow, I updated ComfyUI/Missing Nodes/Manager and even when I open Comfy I get an error about a missing node "workflowUSDU Steps/Denoise" I tried to search for it on Google and asked a friend with more experience and he doesn't know either.
Where can I get that node?
Sorry for any spelling mistakes, sometimes I have trouble with English.
I've got the same error after adjusting some parameters (setting checkpoint, face segmentation model, etc.) it was gone after a reload with F5, maybe a restart of comfyui will help. The node is from "UltimateSDUpscale", you will likely already have it installed.
HI there, that is a group node I put together using two nodes from the "Image Saver" nodes. If after trying what Catastrophy mentioned does not work for you, you can try making the node yourself.
For "Steps", I used "Int Literal (Image Saver)".
For "Denoise", I used "Float Literal (Image Saver)".
After that, I fed the outputs from those into the "Basic Scheduler" that connects to USDU and also into the USDU node itself.
To find the connected Basic Scheduler node, look below the prompt nodes. It should be a collapsed node that says "Basic Scheduler" and matches the color of the USDU node.
Right click on it and pick "unpin".
Drag it somewhere and then right click again and click "expand". Now you will see the inputs. Connect the "Int Literal (Image Saver)" output to the "steps" input on both the Basic Scheduler and USDU nodes. After that, connect the "Float Literal (Image Saver)" output to the "denoise" input on both the Basic Scheduler and USDU nodes.
Now it should work.
The reason I made that group node was just me being lazy and not wanting to have to worry about adjusting the steps and denoise in 2 places for USDU.
Thank you very much for the prompt help :) It works perfectly now
Sorry, I'm Japanese and I'm trying to challenge comfyui from SD forge recently. I borrowed your workflow, but "on_true:output" and "on_false:denoised output" in "Latent Output Switch" are causing an error... These seem to be connected to the green node, but I don't know where to connect them specifically... I borrowed a translation, so the sentences may be a little strange, but I would be grateful if someone could tell me...
Hmm, it should already be connected if you are loading from the workflow here. Did you install all the custom nodes?
The toggle for "Latent Output Switch" should have two latent inputs connected from the sampler node below it.
Then from the output on "Latent Output Switch" it connects to a VAE Decode node that feeds into the Watermark Removal portion of the workflow.
Hard to help since we can't post screenshots in the discussion notes.
Hi, I went ahead and created a new version (2.0d) of the workflow where it should be easier to find where things connect. If something is still throwing an error after a fresh load of the workflow, then it is probably either your comfyui version is not compatible or you are missing the custom nodes.
@Gladas I reloaded it 5 or 6 times and it was fixed... I wonder what it was...
And sorry. I have one more question. How long does it usually take to generate an image using these works? For some reason it takes several times longer than forge to generate it...
@7seventou regarding generation time: it will vary depending on your hardware.
For me, on a 3060, it takes 3 to 4 minutes from start to finish. If I bypass the FaceDetailer, then I usually shave off 30 seconds to a minute.
I haven't used anything like Forge or A1111 for a long time, so I could not compare based on my own experience.
@Gladas FaceDetailer is not included by default here, so do I need to download it separately and connect it...?
@7seventou it is part of Comfy ImpactPack. Custom nodes are not automatically included unless you already have them downloaded. I recommend using ComfyUI manager and using the "install missing custom nodes" feature. Otherwise, you have to search for and install them yourself.
Missing Node Types
ACN_AdvancedControlNetApply_v2
how to find it?
ComfyUI-Advanced-ControlNet: https://github.com/Kosinkadink/ComfyUI-Advanced-ControlNet
Maybe I am just being blind, but where is Denoise for the Img2Img. The only place I see it listed is in the watermark settings, but that doesn't seem to do anything.
It's the same denoise node for regular image generation. When you toggle the switch for IMG2IMG, it just uses your loaded image in place of the empty latent image. I usually use 0.7 to 0.8, but use what's best for you.
Looks like the latest update for Impact Pack no longer has the Ultralytics Provider node. I will see if I can find something else to replace it, but if I can't, I will be removing the watermark removal and face detailer portions of the workflow.
Looks like they put it in another Custom node pack. It can be found at: https://github.com/ltdrdata/ComfyUI-Impact-Subpack. Will update the workflow soon, once I confirm it works the same.
Looks like there is no need to update the workflow. Once I installed the new pack, the nodes loaded up just fine again. Will add it to the list of custom nodes.
If this is a simple comfyui workflow, than i can't imagine what is considered hard
They can be MUCH more complicated, but that is subject to opinion I guess.
The simplest would be the default workflows from comfyui. Basically: Loaders>Prompts>Ksampler>Save Image.
thanks for the workflow, is there an article or something that shows how to get the vpred models to work? im still cant wrap my head around those
I tried NoobAI and a couple models/merges based off their v-pred model. The only actual article I see is here. I believe originally, they had a link to their huggingface page for the guide.
I didn't see any mention of the Model Sampling Discrete node in that article, but I do recall seeing it on one of the workflows from a sample image on NoobAI. Using the node does give better results (for me), but I still wasn't really satisfied.
Honestly, I gave up on using the v-pred models. I will probably try again once they do a full release, but for now I am sticking to EPS models instead. I will probably upload an update workflow soon without that node. In the meantime, if that node isn't useful, it can just be deleted.
@Gladas gotcha, thanks :)
V3 is awesome but I just realized there's no lora node or I'm blind idk? ;-;
Thanks. There is no standalone LoRa node.
You load the loras where you enter your prompts. You'll see toward the bottom of the node where it will say, "select the LoRa to add to the text". The it will add it to the prompt, similar to how A1111 does/did.
You can change the weight be adding your numbers to the end of the lora prompt like this: <lora:IAMALORA:0.7>
@Gladas Thank you for replying! Ah, I see now, sorry to bother you. :3
no problem!
If you are running into an excessive amount of artifacts with Ultimate SD Upscale or it's making things too blurry, you can try bypassing the "TTPlanet Tile Preprocessor Simple" node by dragging the image input noodle directly to the "Apply ControlNet" node's image input and see if that works for you.
I'm thinking of just removing that preprocessor node from the workflow.
Some more testing with USDU. Increasing the tile padding can help, but does increase the time taken. From what I am seeing the padding is actually making the tile bigger. So if you were to set the padding to 512, it basically is adding that many more pixels to the tile size. Tested this both with and without the tile preprocessor node and the results definitely vary. Sometimes it's better with and sometimes without.