
Support me on ko-fi <3
If you want to support my work I would be incredibly happy! Every amount makes a difference! <3

Welcome to version 3! Now with ControlNet and better Faces!
Feel free to post your pictures! I would love to see your creations with my workflow! <333
Greetings! <3
This is a workflow that is intended for beginners as well as veterans. The veterans can skip the intro or the introduction and get started right away. Everyone who is new to comfyUi starts from step one!
What does it do?:
It contains everything you need for SDXL/Pony. Base generation, Upscaler, FaceDetailer, FaceID, LORAS, etc. I assembled it over 4 months. I work with this workflow all the time! All the pictures you see on my page were made with this workflow. I spent a long time working on how to optimize the workflow perfectly.
Important to know:
You will need additional nodes. These are all official nodes that can be downloaded directly from the ComfyUI manager! All you have to do is press Install missing nodes!

How do you use it?:
I highly recommend having worked with ComfyUI before, otherwise it could quickly become overwhelming. With great opportunity comes great ... error? No no! I have set up my workflow in a very structured way and will explain everything step by step!
Let's get started!:
Download the workflow and open it in ComfyUI.
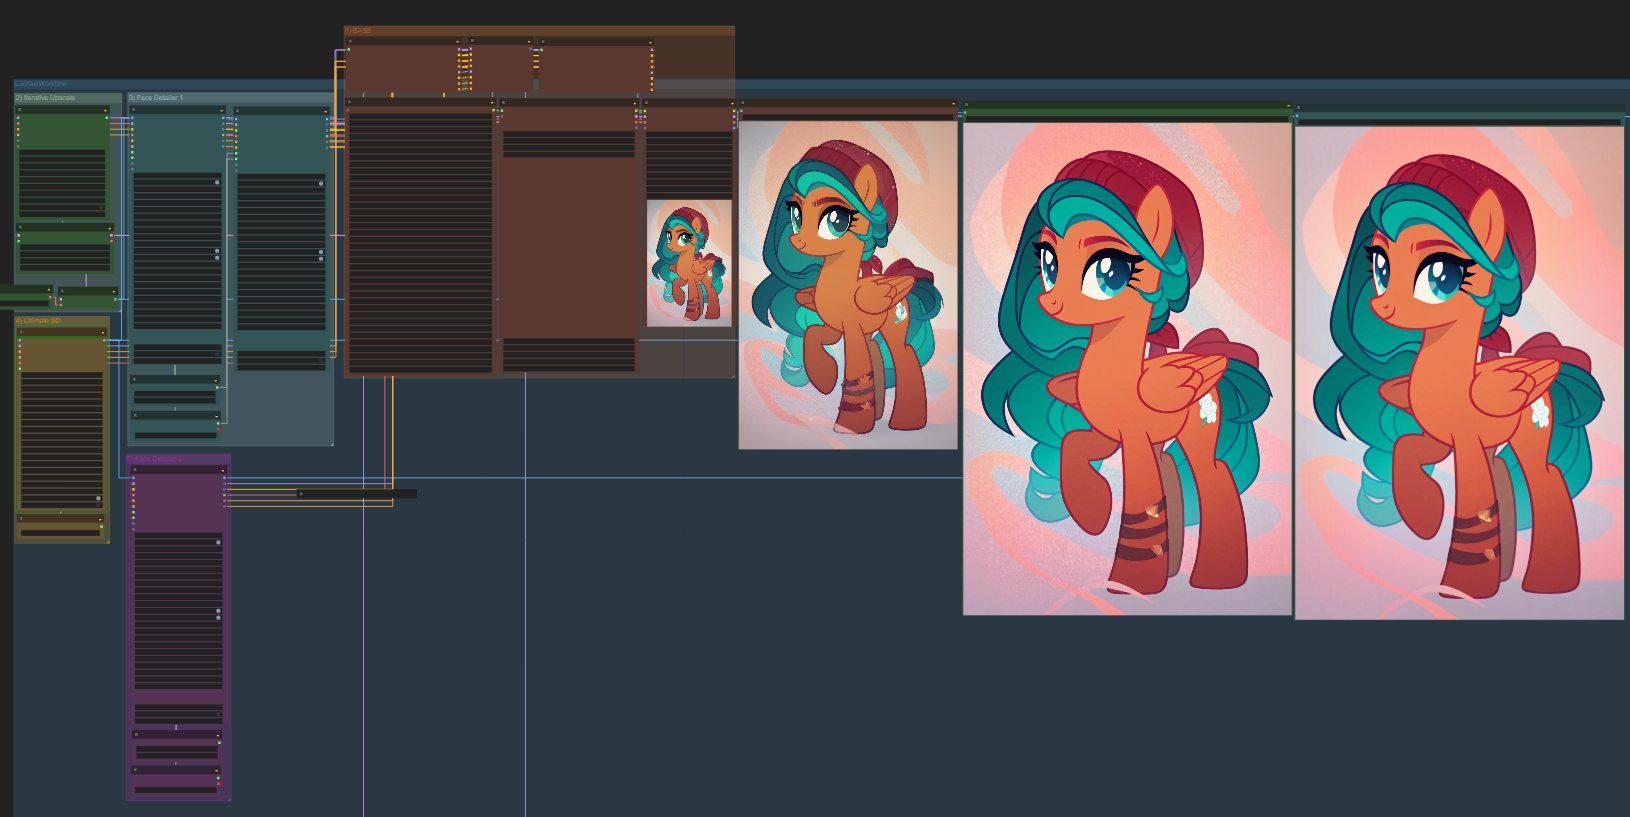
I've color-coded all related windows so you always know what's going on.
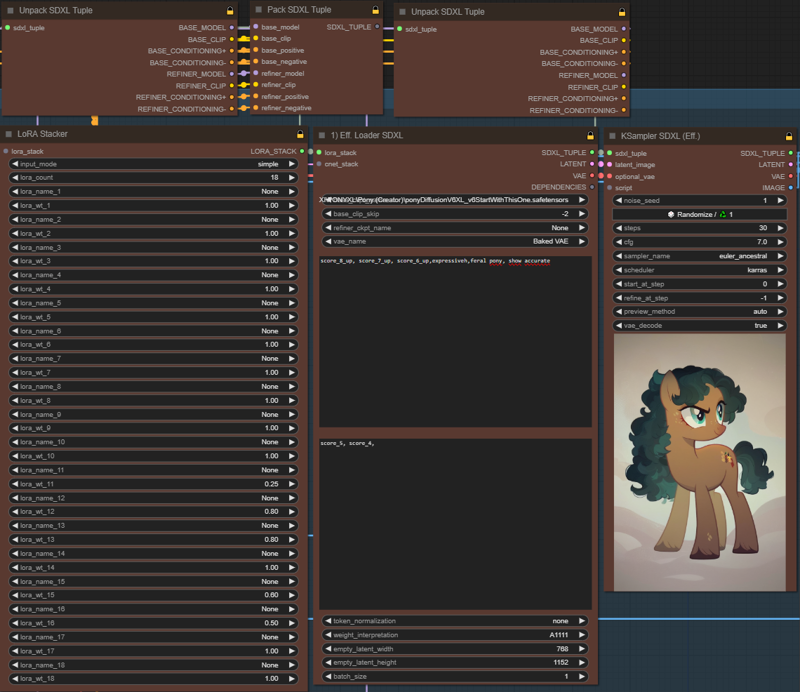
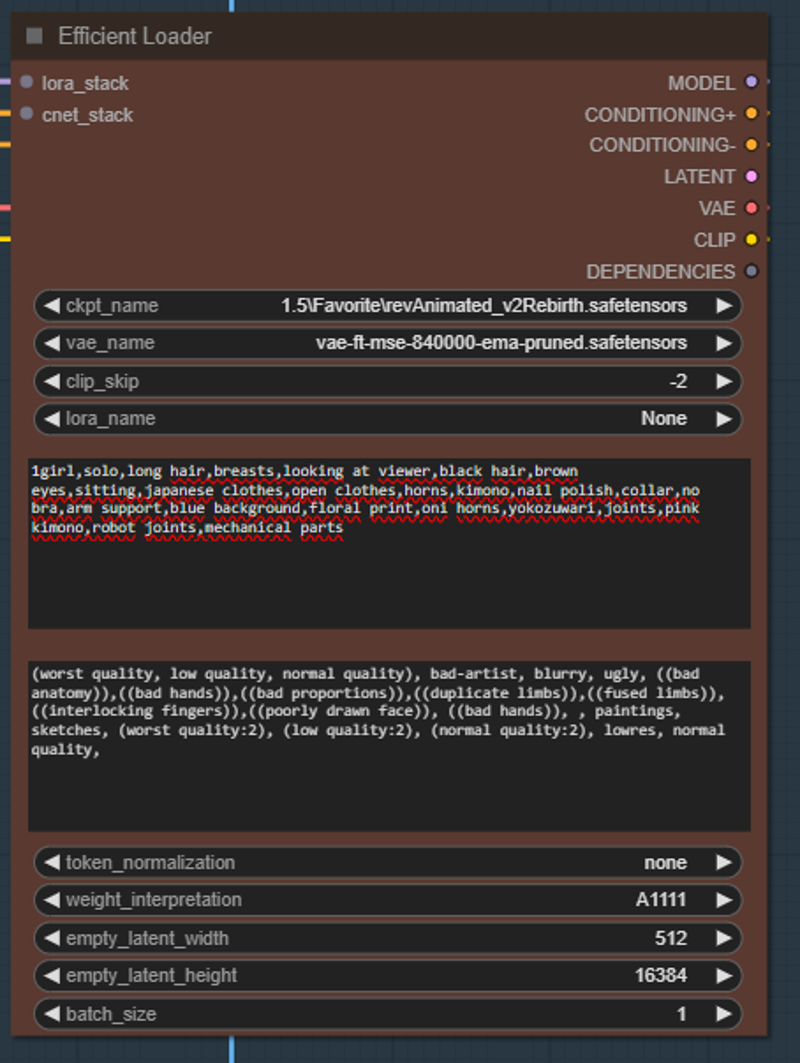
Number 1: This will be the main control center. This is where you'll write your prompt, select your loras and so on. This area is in the middle of the workflow and is brownish. The "lora stacker" loads the desired loras. The "Efficient loader sdxl" loads the checkpoint, clip skip, vae, prompt, and latent information. The "KSampler SDXL" produces your image. Here you can select your scheduler, sampler, seed and cfg as usual! Everything that is above these 3 windows is not really needed, if you want to change something in this workflow yourself, you can continue your work here. But for now they are not important. Let's generate our first image! I will use PonyDiffusionV6XL in the example. https://civarchive.com/models/257749/pony-diffusion-v6-xl
If you choose a checkpoint that is not based on PonyXl you will most likely not get the same results as I did! Use the prompt: "score_8_up, score_7_up, score_6_up,feral pony, show accurate" and paste this in the upper window, the positive pompt window. The lower one can remain empty. If the question now arises what is score_8, this refers to the quality of the image generation of ponyxl. Not really important for now!
 Congratulations the first picture is finished!
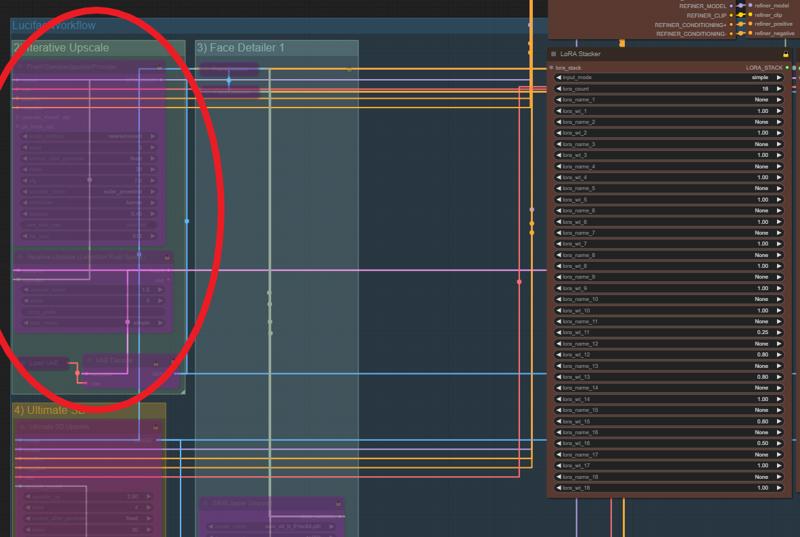
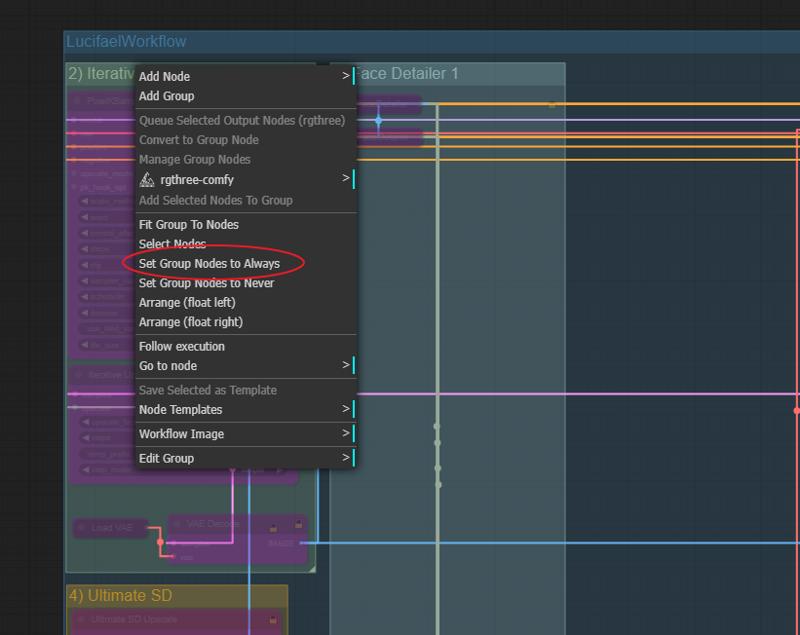
Number 2: You will see that this area is highlighted in purple, what is that? This purple background means that this area is currently ignored. To be able to use this node we have to unlock it. Right click on the upper edge of the green box where it says "Iterative Upscaler". And then Set Group Nodes to Always. Now the boxes are clearly visible and the nodes are unlocked. What happens here? The image is scaled up to a certain size and details are added. The upscaling factor determines the end resolution. The steps say in how many steps this should happen. For now we leave everything as I have set it and press Queue Prompt again to get the next image! Now you should see another image on the right-hand side of the image output which has a much higher resolution and also looks more detailed. On my pony you can see slight changes, on people etc. the details are clearer!
 Load VAE:
In the area of step 2) Iterative upscale, go to load vae at the bottom left. Open the node by clicking on the dot, then you can select your desired vae:
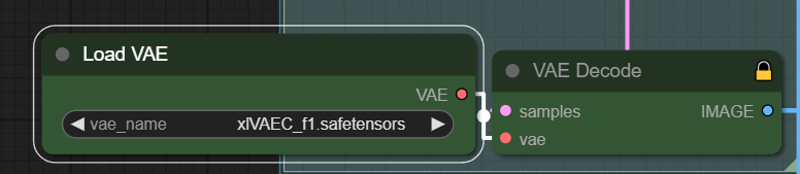 I use a very great vae that you can get here on civitai. I actually use it 24/7 and only change it very rarely! Check it out! : https://civarchive.com/models/152040/xlvaec
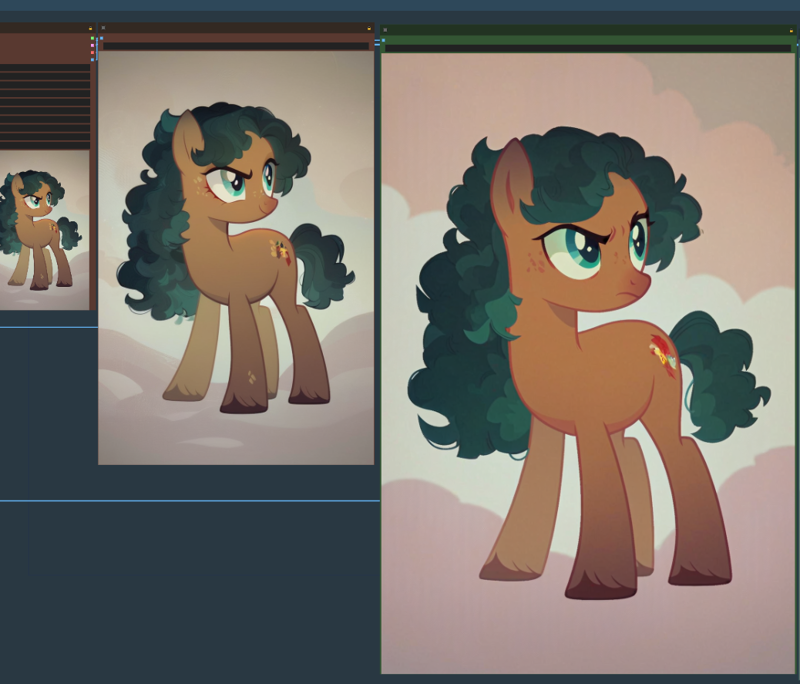 A more detailed larger pony has been successfully completed! Congratulations!
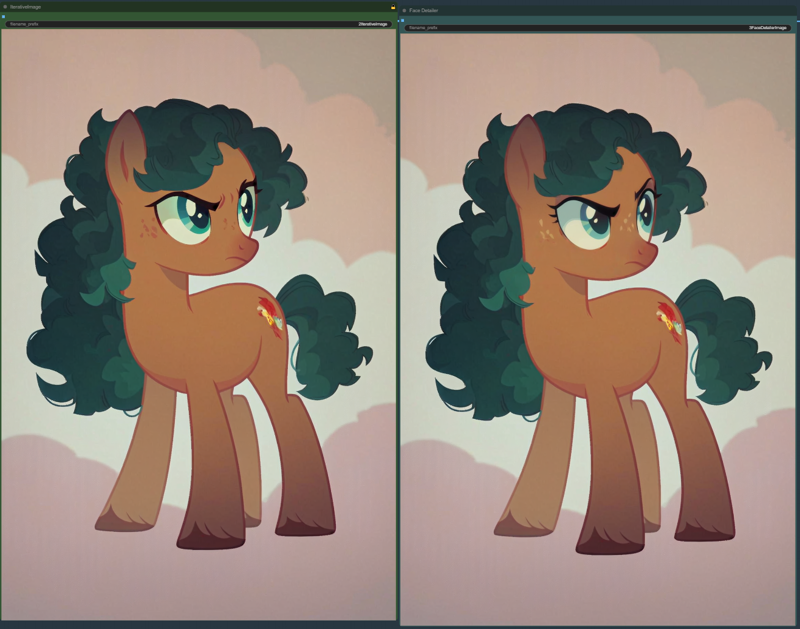
Number 3: The Face Detailer node. Here the face of the characters is significantly improved or repaired. We all know blurred faces or pictures where the characters look more hideous than the Hunchback of Notre Dame! We don't want that, no no! So we need a node to do it for us, and she does a great job! The node will improve all faces that are found, no matter how small or inconspicuous. In my pony picture the effect will unfortunately not be so obvious, but I will add an example picture where you can see it better. So let's go to the FACE DETAILER to the right of the Iterative Upscaler. I know the node looks bad and frightening. BUT. You don't have to change anything! I have set the nodes so that you don't really have to do anything specific and the faces will always be good. So all we have to do is activate it again with a right click and "Set Group Nodes to Always", press Queue Prompt again and let it run. As I already said, there will hardly be any difference in my pony example. The freckles have changed to white and a little more eyelashes have appeared, it's more noticeable on people!

 Up to this step is mostly my main workflow. This resolution is usually more than enough and so is the level of detail. If you want to improve the image significantly, step 4 comes into play.
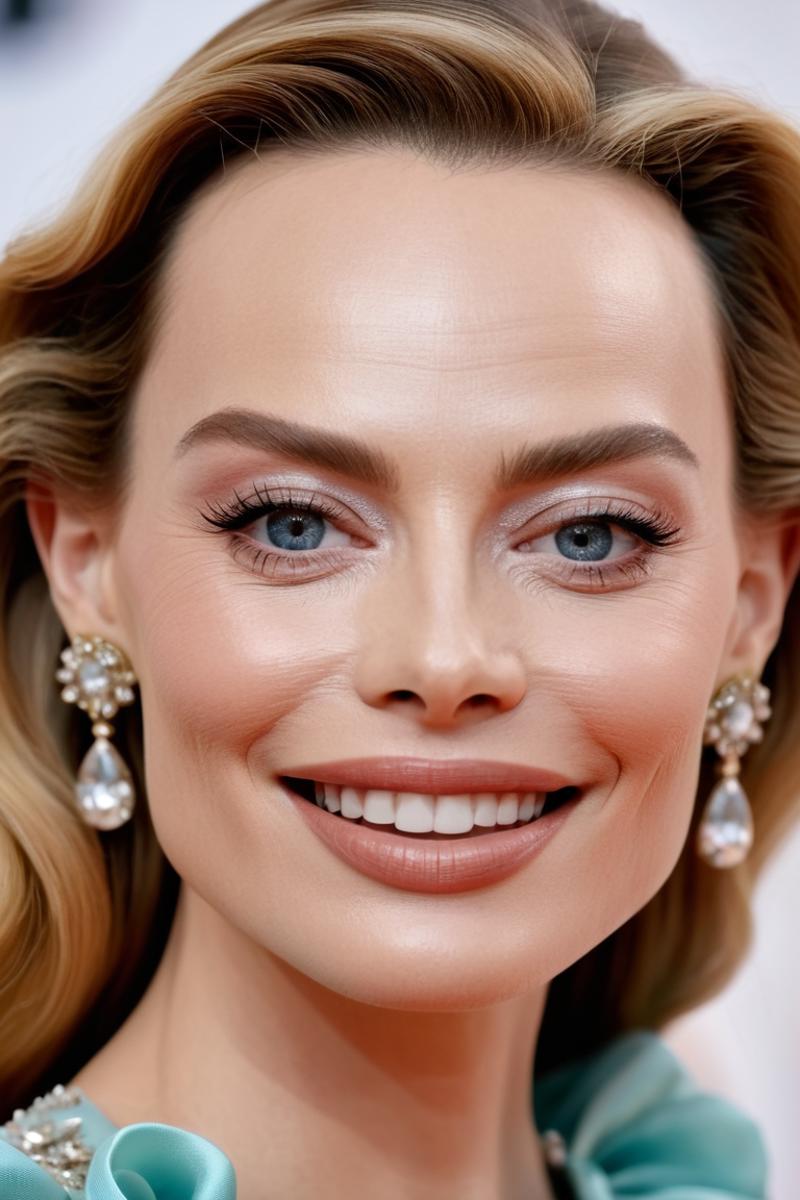
Face Example:
 IMPORTANT! V3: New Face Detailer method! Scroll down to see the new method!
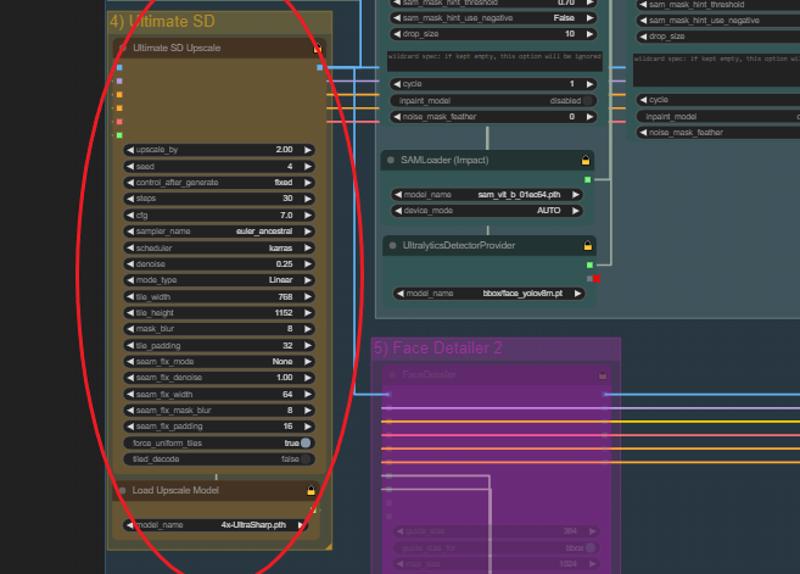
Number 4: The Ultimate SD upscaler. Unlike with iterative latent upscaling, the image is hardly changed and only made more beautiful! Of course, you can give even more freedom with a higher denoise, but there are usually too many disruptive factors. There are many different upscalers to be found on the internet. Personally, I change from time to time depending on my taste, but the model I use now is called: 4x-UltraSharp. I link this upscaler. https://civarchive.com/models/116225/4x-ultrasharp
Set the upscale factor or leave it at 2. This will take some time depending on your Hardware <3
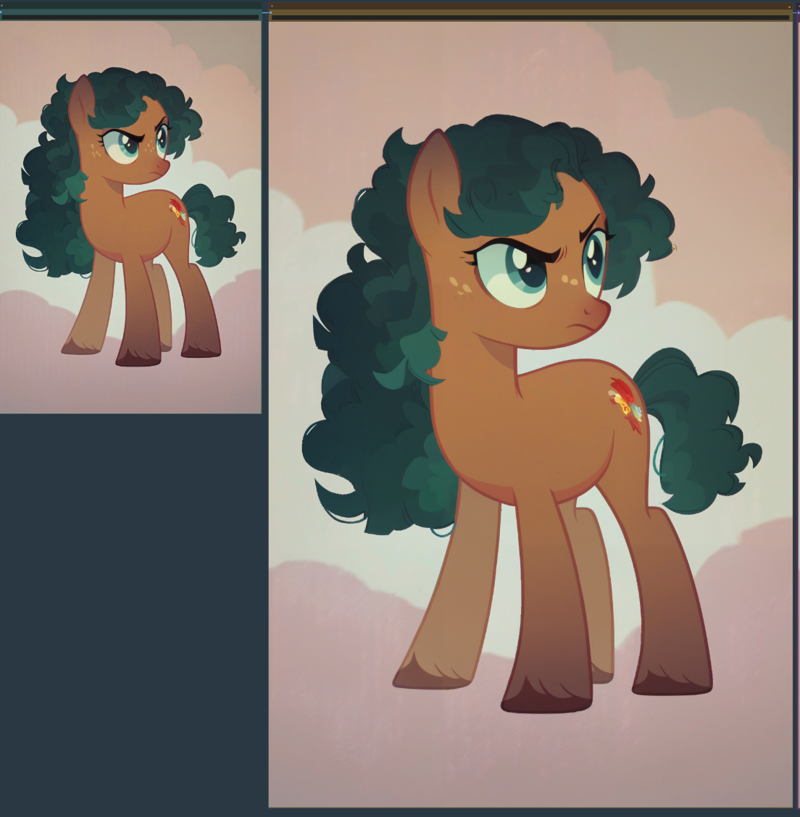 You can see that the image has hardly changed but the resolution has increased significantly, which is exactly what we wanted. A upscaled big image is finished. Congratulations!
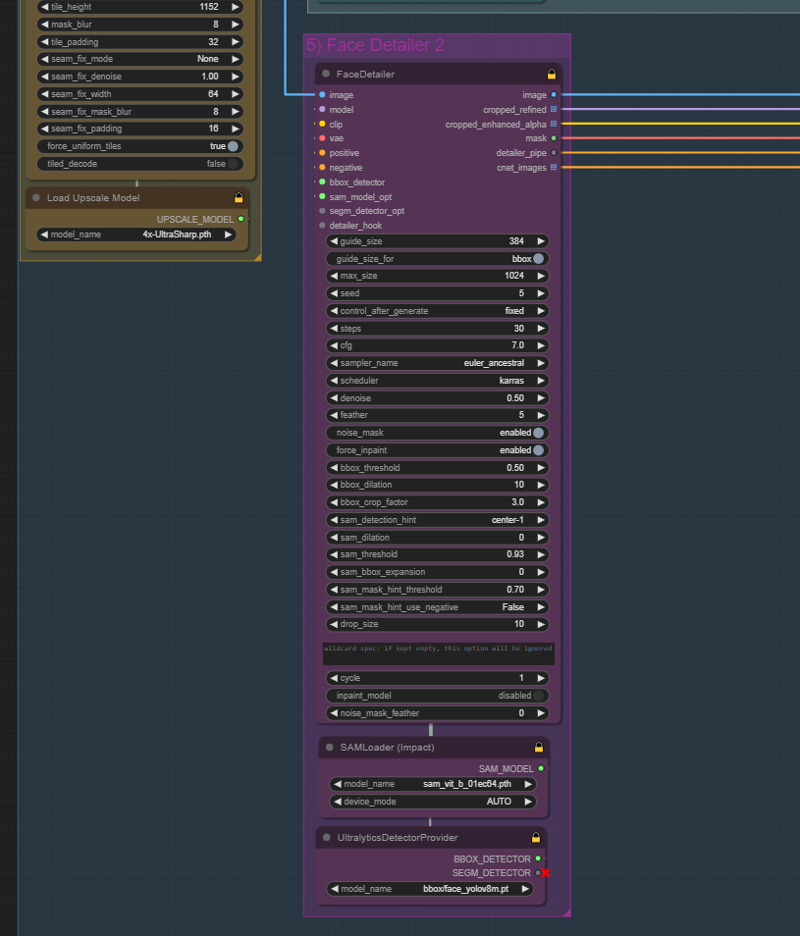
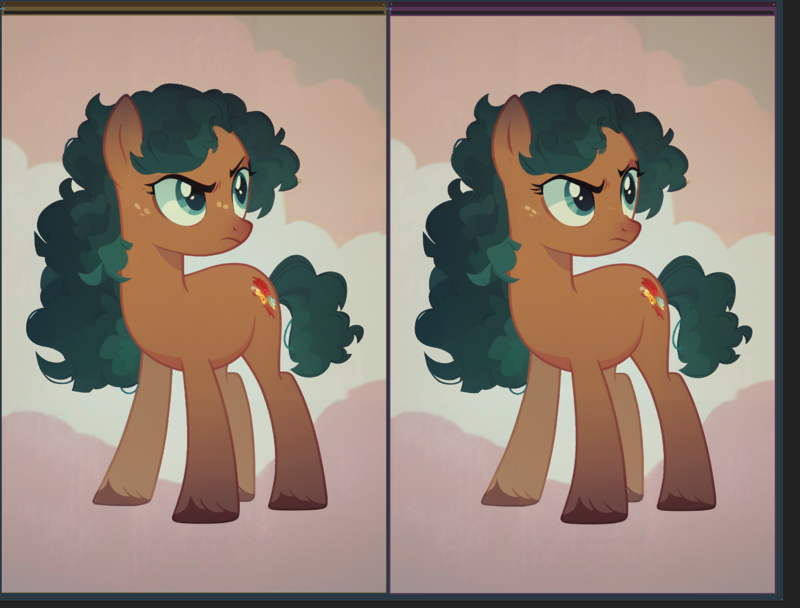
Number 5: Our actual last step. Another face detailer. It happens some time that faces distort at such a high resolution upscale. That's where our friend the face detailer comes into play. As always, right-click to unlock number 5 and let the whole thing run. As before, we could run 2 face detailers one after the other, but this is usually no longer necessary and saves a lot of time! Complete! Now we have a high resolution, beautifully detailed image. in my case a little pony. Not much has happened here in this example. Eyelashes were added and the entire face was freshened up again. In the other example with a human it is clearer!
Lora stacker for beginners.:
Sooner or later everyone will get to the point where they will use Loras. This is where the Lora stacker comes into play! Very easy. Select a Lora in the bar and click on it. that's all. The number indicates the weight of the lora. The higher it is, the more valuable and more influential it is. In my example it is a lora to increase the level of detail. I once set 18 slots, you can also set them down with lora count. I often activated around 12 loras in my generated images, which is why I kept so many slots free! Just adjust it for yourself and if the slots are free it doesn't have a negative influence!

Optional FaceID:
FaceID works very badly with pony unfortunately. It's best to use it only with SDXL models!
If you don't want to use Face ID, simply bypass the whole group as usual and generate pictures as normal without face id!
FILES:
What do we need? We need 4 files that i will inlcude as a zip. They are not done by me and all the effort and thanks goes to the original makers of the files!
 These files will be included in the zip so you don't have to search for them online!
1)
 These two files must be placed in the folder I show you in the picture: ComfyUI_windows_portable\ComfyUI\models\ipadapter.

2)
 This file goes into: ComfyUI_windows_portable\ComfyUI\models\clip_vision

3)
 This one goes into: ComfyUI_windows_portable\ComfyUI\models\loras

That's all for the preparation, now we can start!
 I have attached the test picture with which we will try Face Id!
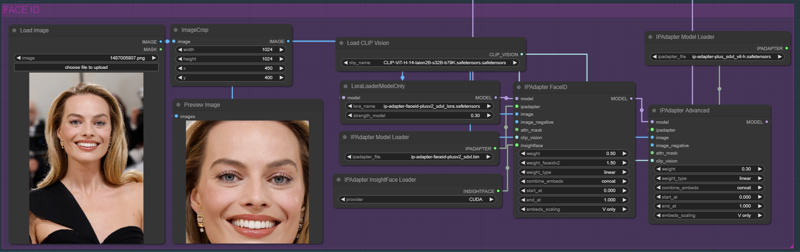
FaceID basic explanation:
1)
 Upload the face you want to use.
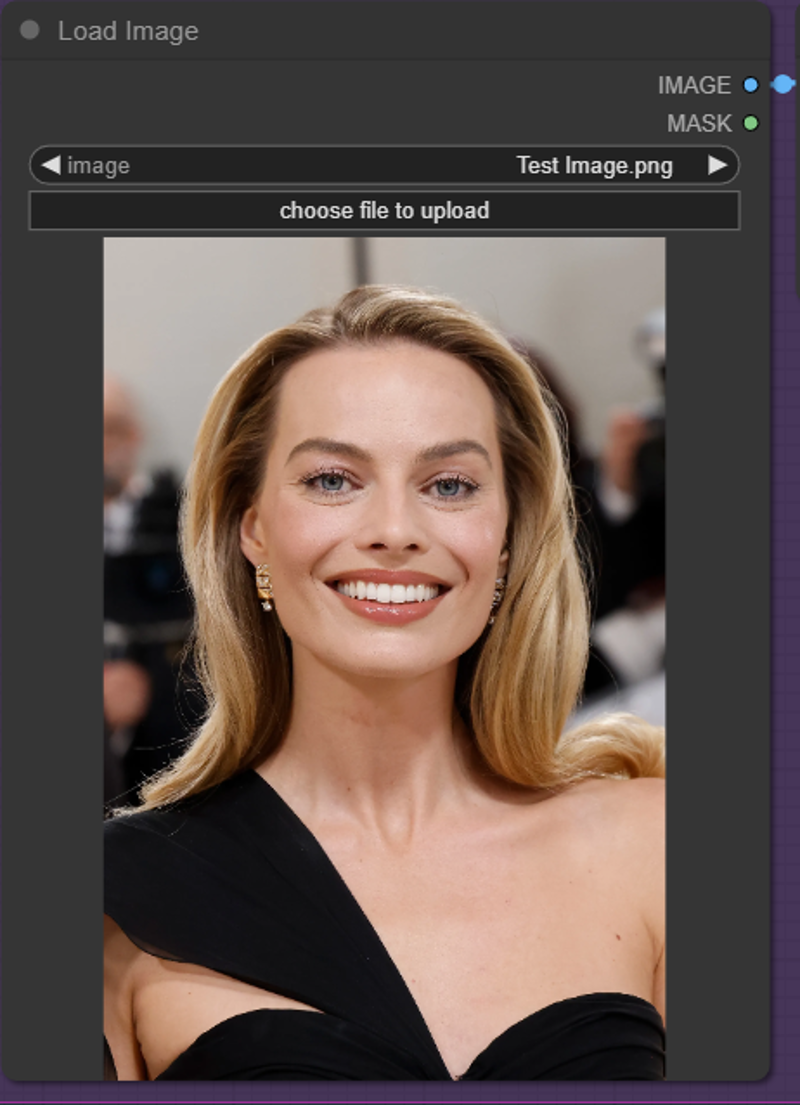
2)
 Crop the picture so that the whole face is visible! The higher the resolution of the image, the more it needs to be aligned. Otherwise 768x1125 should fit, you have to try it out.
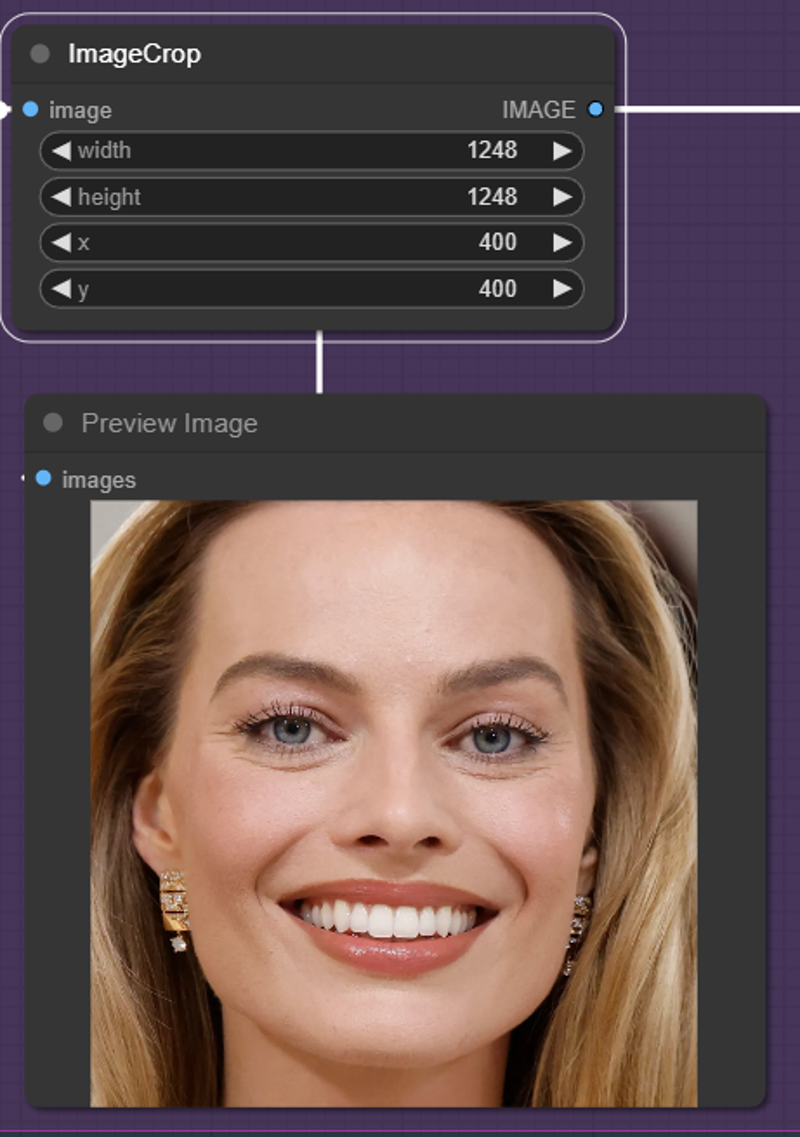
3)
 For the rest, you should really just test the weights until you find the right values that you like! Personally, I don't think FaceID is as good as it was with SD 1.5, but you can still get great results, just try it out!
Result:
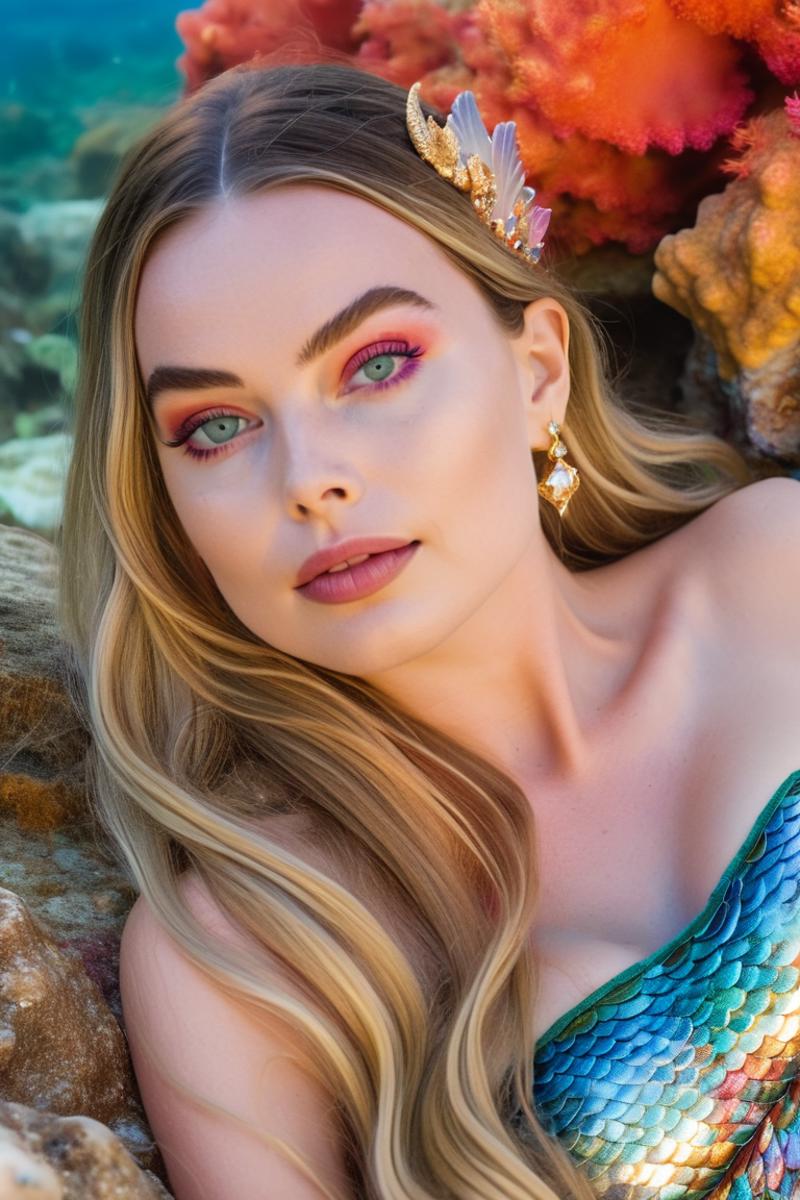
You see... somewhat modest. However, you must bear in mind that this face was created without loras and still has very flexible possibilities. For example, you can integrate yourself into a generation. It offers many exciting possibilities, please try it out and if you have great results, please share them here!
Image Saver:
Hit Missing Nodes in the Manager and download the missing node! And then off you go!
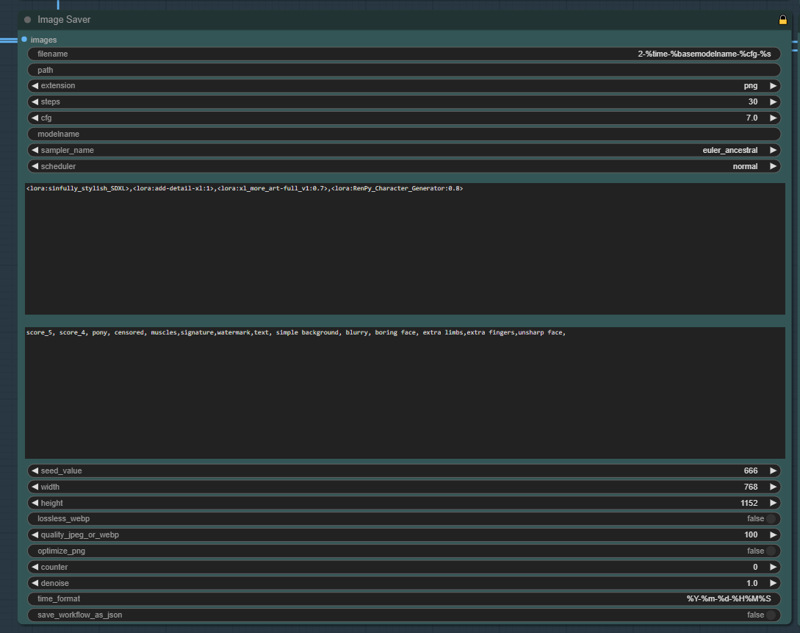
The Image Saver saves your images and integrates your data at the same time. If you are used to A1111 automatically recognizing everything in civitai then this is similar. Unfortunately not quite as good as there because we have to adjust things in my workflow. But if, like me, you use the same generation settings relatively often, you can hardly tell the difference! Enter the data you want to have when saving, i.e. CFG, sampler, steps, schedulter, etc., here. You have to do this where you save your images in the workflow, i.e. if you always save your images up to the last node, then it is enough to use the image saver at the end and change the entries! But if you want to be spontaneous, you have to customize everything like me. Believe me once customized and you will quickly find your way in!
Integrate Loras:
You have to integrate Loras here in the same form as you know it from A1111! : <lora:sinfully_stylish_SDXL>,<lora:add-detail-xl:1>,<lora:xl_more_art-full_v1:0.7>
CivitAi then knows which loras were used and integrates it into the picture as you know it! Thats it!
ControlNet!
What is ControlNet?:
ControlNet helps, for example, to reproduce positions exactly from a reference image.
Today's reference picture is unfortunately not mine! A great creator from Instagram inspired me and I thought it would be great to use!
What do we need?:
We need files that we can use in ControlNet. Since I got bad feedback with version when I upload the files, I will now only upload my workflow and you have to look for the files yourself. Just search the internet and download!
 https://civarchive.com/models/136070/controlnetxl-cnxl
eurotaku Uploaded many on CivitAi!
Let's go!
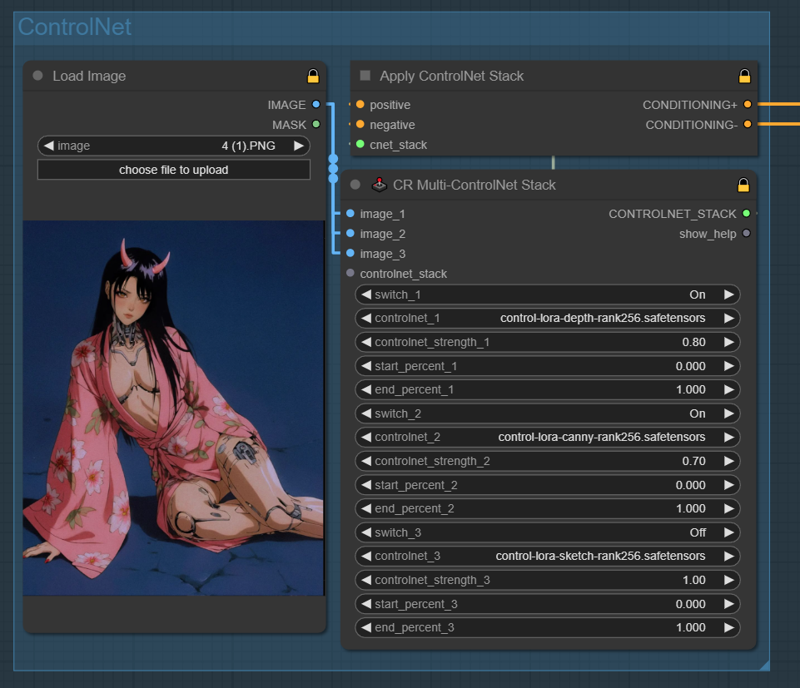
1) Choose a reference image that you want to recreate. Load Image!
2) In the Multi ControlNet stack, select which models you want to use. Here you can select a maximum of 3, but that should be enough! I will not explain what each model does, there are enough tutorials for that!
3) Choose the strength and the length of the effect and that's it!
Important: If you take a reference picture where the person is standing and you have in the prompt that the person should sit, it can lead to strange results! Pay attention to this!
My prompt for the reference picture is this:
1girl,solo,long hair,breasts,looking at viewer,black hair,brown eyes,sitting,japanese clothes,open clothes,horns,kimono,nail polish,collar,no bra,arm support,blue background,floral print,oni horns,yokozuwari,joints,pink kimono,robot joints,mechanical parts
Result:
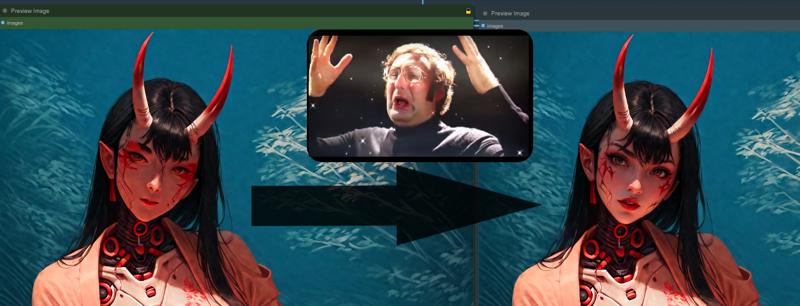
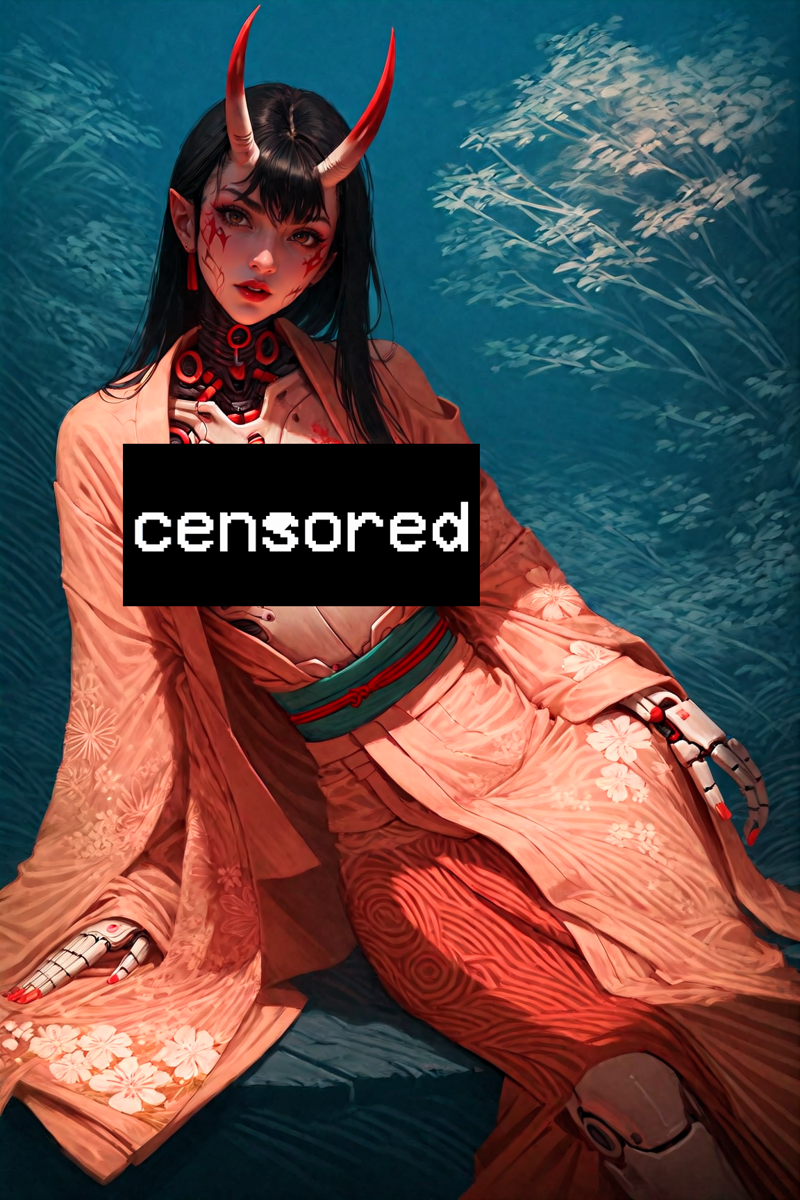 You can clearly see that the position has been taken! Perfect!
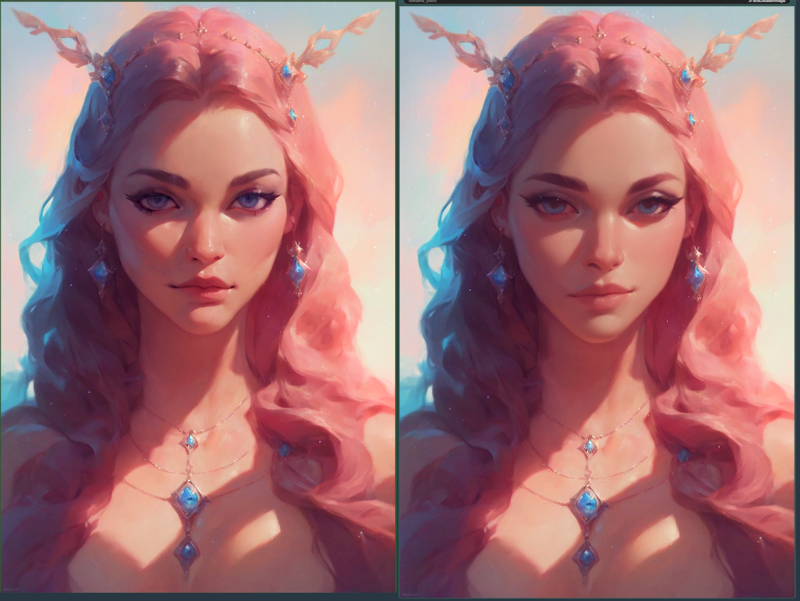
New Face Detailer method!
 Unfortunately, pony and Xl in themselves are not always quite so beautiful when it comes to the face. While researching through several excellent creators and exchanges, I came across new methods to generate much more beautiful faces! I would like to say a big thank you to @Delnight!
The new method consists of using not only fringe models for the face but also old SD1.5 checkpoints. 1.5 generates fabulous and beautiful faces that you very rarely get with SDXL, especially with Pony it is as @Delnight! would say "hit and miss".
 1.5 checkpoints that I would use:
https://civarchive.com/models/7371/rev-animated
https://civarchive.com/models/234898/vixons-fantasy-mix
How to use?
Simply load the 1.5 model in the efficient loader (under the main loader) and write in the prompt what your face should look like. I personally just write the prompt from the main sampler again, but you can also say here that the gesciht has summer spurs, vampire fangs or other stuff!
Have fun!
Description
Basic workflow explanation.
FAQ
Comments (22)
Great. Now it's time to ditch the messy, sloppy flow I'm using. I hope you'll add the FACE ID part as well. Good work
Thank you very much! I think I will describe the FaceID next week when I have time again and I will also explain the individual nodes more to make even more individual pictures! <3
Feel free to post your pictures! I would love to see your creations with my workflow!
Wow! Thank you for sharing your work! Believe it or not, it is exactly what I've been looking for over the weekend, a good workflow with hires fix, face detailer and ultimate upscale!
Can you please guide me a little on a problem I'm having with your workflow?
The first preview image is saved and it looks very good but as soon as the second image is saved, the colors change drastically, is not like it looks bad quality, but the skin tone changes too much to orange and for example, greens changes to bluish.
I'm using a pony based model and trying a portrait face closeup of a lora character.
Thanks!
This is due to the vae you use for the 2) node of the iterative upscale. Depending on that, there are some that leave the color tones unchanged or in my case I always use one that makes the colors crisper! Depending on your taste you can exchange them. Just look for SDXL VAE !
If there are still unclear questions I will collect them and at the weekend I write a faq section !
@Lucifael Thank you! changing the VAE did the trick. One issue I'm having is that after finishing a full cycle of your workflow (5 steps) the top bar shows as idle, if I click on Queue Prompt to generate another image, it doesn't do anything, I have tried clearing or refreshing the queue to no avail. Only works if I change some parameter or change something in the prompt itself. Don't know if something wrong with the workflow, my PC or Comfy UI itself.
I'm very happy to help. The new problem is also solved quickly! Go to seed in the 1) node and leave it at -1 or enter a new number. This way you can always generate new images with the same settings! Have fun!
a little overwhelmed for sure xD but i can understand it and it does a lot for me that i would otherwise not know how to set up. can i get a hand with faceid? i know i shouldnt unlock it but it might be fun to use
thanks
I will work on the explanation for FaceID very soon! It’s not very good with Pony tho but with normal XL checkpoints ! :) weekend I will write something !
Thanks for the workflow! It's a little too much for me at the moment, but it's helped me with my own workflow and shown me a couple nice new nodes. I've learned some stuff and I appreciate it!
I posted my image below. Unfortunately, it didn't save the workflow metadata.
It's using 3 samplers, 2 ControlNets for posing and style transfer, followed by Ultimate SD Upscale, and a single FaceDetailer run.
I'm very pleased to hear that! I can well imagine that it's a bit overwhelming at first, but once you've worked with it a bit, everything will make sense very quickly! Keep at it and have fun! :)) <3
https://github.com/alexopus/ComfyUI-Image-Saver.git <- Note that
@bsjnee0966 I'll check this out, thanks!
@bsjnee0966 Actually very nice, i looked for something like that for very long <3
I have released a new version of my workflow where the data is integrated! If you are still interested!
Clean and simple.
Thank you very much! <3
@Lucifael, Greetings! I've been using your workflow a lot and I really like it, very useful and does exactly what you described.
I need guide on what nodes and settings to tweak to reduce the noise added to the overall image, specially the skin. I really like the uplift the workflow makes to the faces but when creating images of people, the skin also changes a lot. I've been tweaking the denoise and steps on the upscale nodes and face detailer but I'm struggling to find the sweet spot.
I was used to the face detailer in AUTOMATIC1111 where most of the time only the face was edited and the rest of the image was only modified by the hires fix or the ultimate upscale.
Any tips will be much appreciated.
Thanks!
I'm very pleased that the workflow is helping you so much! Could you upload a specific example with the difference regarding the skin problem? I don't know exactly how I could help you with this at the moment unless I replicate the problem!
@Lucifael Thank you for your reply and disposition to help. After more testing and fine tuning I learned that with most XL models I tried, in your step #5 if I leave the denoise to 0.50 as your original workflow I end up with a disfigured face, like multiple noses, mouths or eyes. I had to reduce to 0.30 and even lower for certain scenarios. Same goes for the step #2, most of the time works with a denoise of 0.40 as your original settings for #2, but some times I guess depending on the prompt or loras,, it changes or adds unwanted stuff like for example if my prompt has "hair over shoulder" for a hairstyle with a single braid or twin braids, sometimes adds a piece of hair to the shoulder that wasn't there originally.
For step #3 most of the time with a denoise of 0.50 the changes are too drastic for the face in my tests, so I ended up using 0.35 most of the time.
So basically there is no spoon lol. There is no definitive settings, it depends on the model itself, the prompt, the loras, and much more so the best is to keep learning and fine tune depending on the specific need.
Nevertheless, you gifted us a very useful, clean and overall great workflow and also knowledge. I am very grateful.
Congrats on your new release! Here hoping for version 3 and ControlNet for poses or image referencing...
Cheers!
@k1ngfloyd Very kind words and useful information for others that use comfyUi and beginners. Thank you! The best you can do is keep testing and learn from stuff that went wrong like you said. V3 with control net can be added very quickly next weekend !