
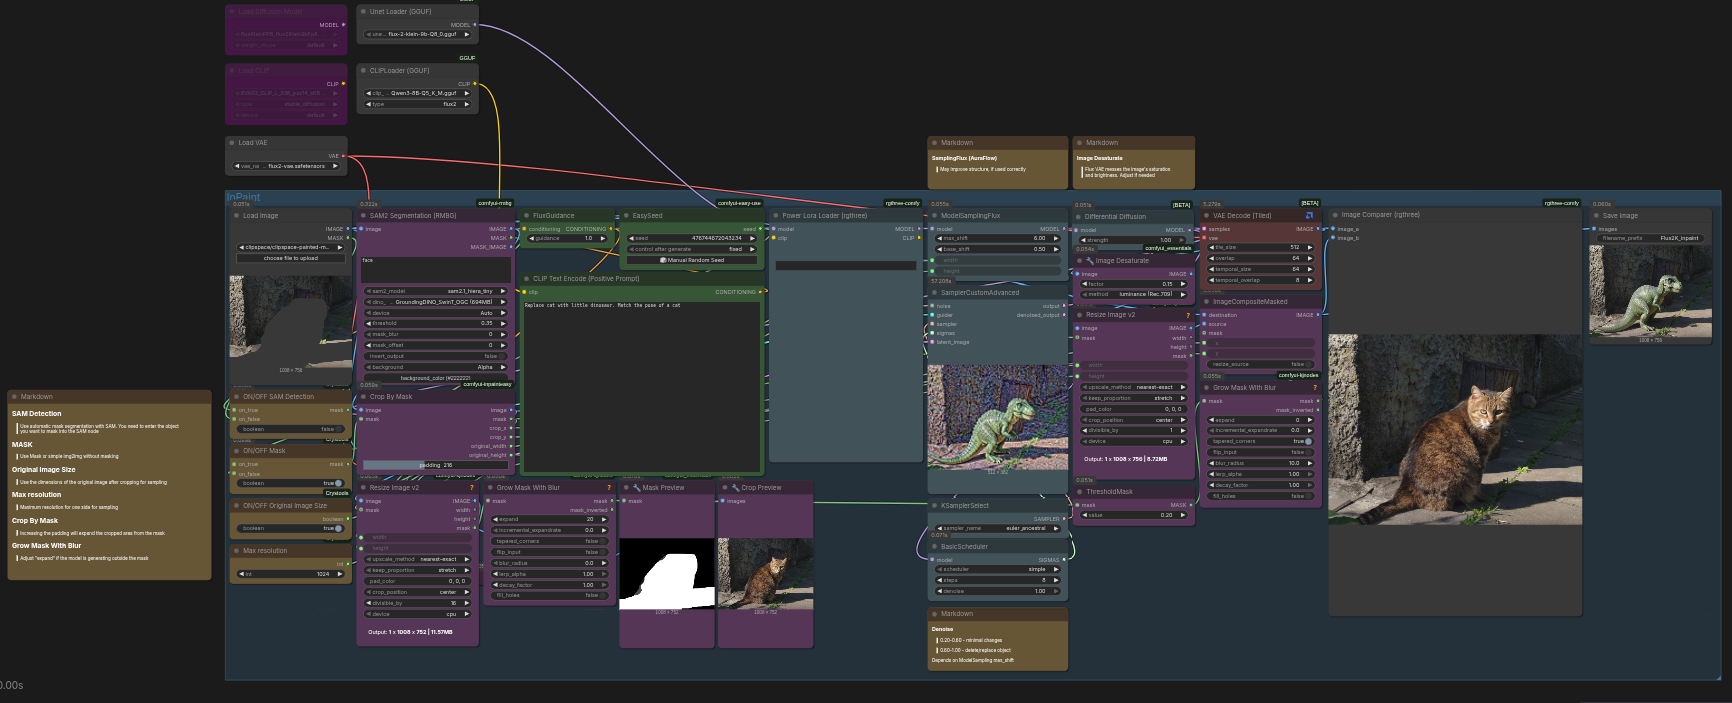
Here's an inpainting workflow for Flux that actually works without eating all your VRAM or messing up the original image colors (kinda)
Instead of processing your entire image, it isolates the exact area you want to change, inpaints it at high resolution, and stitches it back together. You can either draw a mask manually, or just type what you want to mask using the built-in SAM2 node.
* Flux Vae and Flux 2 Klein itself have a tendency to change the brightness (rare) and saturation (more often) of the inpaint areas. Therefore, I included a small workaround aimed at desaturating the output before compositing. (The approximate range is 0.05–0.20, which varies for each image.)
Requires: Crystools, KJNodes, InpaintEasy, ComfyUI_essentials, rgthree, and comfyui-rmbg (for SAM2).
Description
FAQ
Comments (7)
finally found the true inpainting workflow for this model, work great. the quality is also impressive than other inpaint workflow i test only :))
Sorry for newbie question.
The SAM2 is very unstable and a lot error for me. So. How to manual draw inpaint area? Please.
Just right click on the uploaded image and select "Mask Editor"
There is an “ON/OFF SAM Detection” switch, which must be turned off when using a manual mask.
hi just tried ur workflow but the "SamplerCustomAdvanced" is black
I get the following error:
mat1 and mat2 shapes cannot be multiplied (512x768 and 12288x4096)
This ALMOST works for me, but the scales seem off for manual masks. The cropped mask is much bigger compared to the cropped image, so when it puts them back together, the generated image is far bigger than the actual masked area, meaning the final inpaint only shows the center of the new masked information, and the rest fades out. Do you know why this might be? I didn't change your settings that I know of.