

V3: Solve the saturation problem + has more variated dataset, ill do v4 with more sharpen for images that already are bigger
Made with collaboration with @artificialguybr
this actually upscale compressed and bad looking images, but dont work on blurred image and very pixelated ones.
to upscale more than 1024x1024 as default of qwen, you need to change your workflow to upscale the image in latent before using the lora.
 Prompt: upscale this image
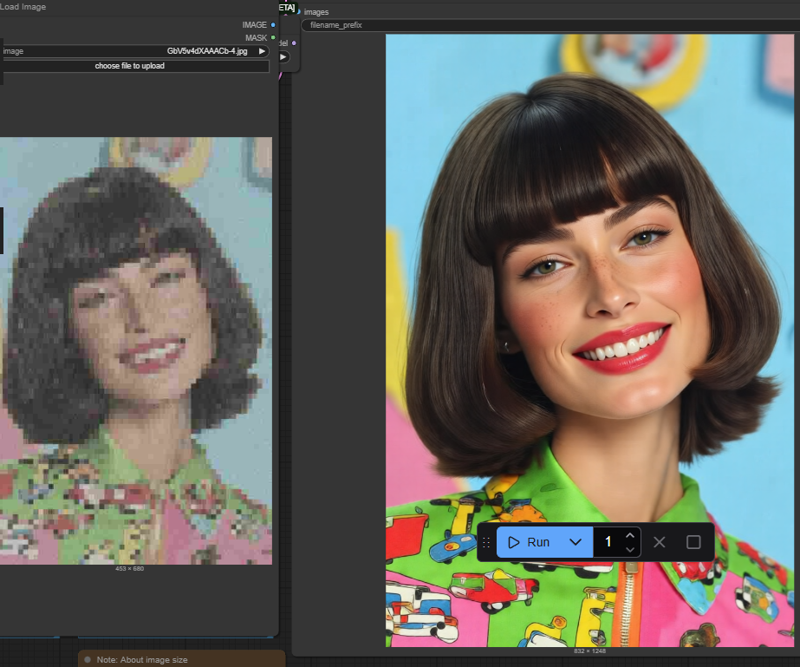
Description
FAQ
Comments (38)
This might be the best upscaler I've ever used
So I guess you've never used seedvr2- for low rez, fuzzy and old photos of people, nothing comes close!
More options is better, of course, but really everyone should have seedVR2 as their first go to for difficult upscales. SeedVR2 is notorious for being an impossible to use video upscaler (on local hardware), but for a single frame (ie., an image) it works brilliantly locally.
Sometimes it works great, sometimes it's like "i don't know what you want from me", even when downscaling before upscaling.
Where can you download that? I thought it was paid.
v1 is good, v2 not work well, v3.1 work very good.
did you manage to not having the image changing the angle? my case is a mirror selfie girl, the output give me the image with the person more far away from the mirror se we see bigger angle...
@carlitajohn89931 i think this is the original problem from base model, it extends the image rather than enlarge the image. in a very rare case, it enlarge it.
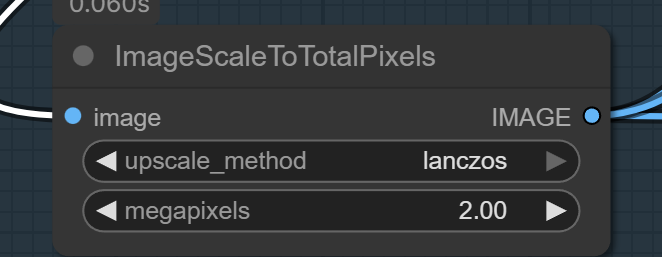
@takomli2013979 there's the v1 and the v3 the v3 seem to work good for details but the v1 doesn't distort as the v3 or im mistaken here, i've already setted the scaleimagetotalpixel node to 2.00 lanczos or nearest-exact but prefer lanczos and just follow the load image and come right before the vae encode which goes to the latent entry of the ksampler, there's still the perspective distance changes, anyway i think i've found a fix for it but im not sure im gonna keep trying and if it goes well then i'll post preview here also if the author come here and see my message if you have a clue on how to handle that any tips? btw good work, rare to see a lora functioning nowadays
It's amazing!
This works pretty well when upscaling to ~1 megapixels. However, the view/perspective changes when I upscale images to over 1024px. The saturation and contrast of the upscaled images also increase when going over 1 megaxpixels.
I've had pretty good results using v1 first, then using the output image as the input image and running it again through v3.
Belo lora!
edit: I used qwen-image-lighting-4steps-V1-0 with 4 steps, qwen edit 2509 fp8 on both passes. Strength:1 on everything
bro share the upscaler workflow
@arjunharjunh736 it's just a regular ass qwen edit workflow, nothing special. I was manually copying the output from the first pass with v1 then pasting it into the "upload image" node and running the workflow again a second time but with v3 instead of v1. Worked well for some images, but not all
I thought going over 1 mega pixels causes issues with QWEN?
The limit is for generating. Once the generation exist, you can upscale it as usual.
you can go better with latent upscaling, them sampling then again
@luisa_pinguin How do you do this, what is the workflow?
hi can you send a screenshots of the workflow... im really lost right now..
same request, I'd love to see the workflow to achieve the samples please! Thanks
im using the default qwen edit workflow from comfy ui templates, nothing new.
same request, I'd love to see the workflow to achieve the samples please! Thanks
On the top level of the comments here I explain the process for those that still need it.
If you can share the workflow, it would help a lot, not everyone is an expert on this site
On the top level of the comments here I explain the process for those that still need it.
Amazing LoRA. Has beaten Nano Banana. Enough said.
Share workflow please, i can't make it works : (((
Right click and unpack the nodes in qwen- See the lora? Look what its attached to. Duplicate the lora and add this lora model into it. connect the input of the new lora with the output of the original lora. with the new lora connect the output to where the same output was from the original lora. And thats it. Assuming you downloaded the model then reloaded comfyui this should work fine for you.
@aidude464 AH! I see now, thank you very much. I'll post a version of this on the top level for everyone else.
face deformation = 10000000000%
send previews of your outputs?
Lora Fantástico. Obrigado mestre :)
Do I use this as a lora or is this a upscaler model? For example do I save it in the lora folder or the upscaler folder in comfy? Does this also change the dimensions of the image, i'm looking to try to make stuff that I can print near poster size
On the top level of the comments here I explain the process for those that still need it.
You will need to use a Resize node to actually change the size of the image, put this in between the input image and the Qwen Image Edit nodes. I have no idea if you can go to that size, it would take a lot of GPU time to make something that big.
For those of us having trouble figuring this out, aidude464 was kind enough to explain it. I will repeat and expand upon it here.
The Qwen Image Edit node is a compacted subgraph, if you hit the icon in the top right of the box it will unpack into a separate tab so you can see everything in there. On the left side you will see the Load Diffusion Model node, and two Load LoRA nodes, note that the Diffusion Model is first, then the two LoRAs. Right click on one and hit Clone. The duplicate will appear on top of the original, drag it off, above it will work well.
In the LoRA name field, click and find the qwen-edit_Upscaler LoRA, click on that.
Now, go over to the ModeSamplingAuraFlo... node to the right, click on the purple dot that is the model input (left side), drag it to the input (left) side model point on your LoRA node, a line should now run from the MODEL point on the previous LoRA to your new one. Click on the MODEL point (output right side) on your new LoRA node, and drag it to the NSAF node's model input point that you dragged the input from before. If all is done right you should have your new LoRA node, and lines running from the top previous LoRA node (lighting LoRA for me), to the new upscaler node, and then to the MSAF node. On the tabs above you should see two tabs below your list of open workflow tabs, one on the left is the name of the current workflow, and the one on the right is the subgraph you have open. Click on the workflow tab, both subtabs will close and you should be back to your original tab. Save your workflow, I recommend a different name, and try it out.
Someone please just make a workflow <3
so just to be clear lol for this its just used like a lora just add it in ?
Details
Files
qwen-edit_Upscalerv3FIX.safetensors
Mirrors
qwen-edit_Upscalerv3FIX.safetensors
qwen-edit_Upscalerv3FIX.safetensors
QWEN_Upscaler.safetensors
qwen-edit_Upscalerv3FIX.safetensors
qwen-edit_Upscalerv3FIX.safetensors
QWEN_Upscaler.safetensors
qwen-edit_Upscalerv3FIX-mid_2046703-vid_2377229.safetensors
qwen-edit_Upscalerv3FIX-mid_2046703-vid_2377229.safetensors