

English instructions are below the Japanese ones.
私が普段から愛用しているComfyUIのワークフローです。ご自由にカスタマイズしてお使いください。
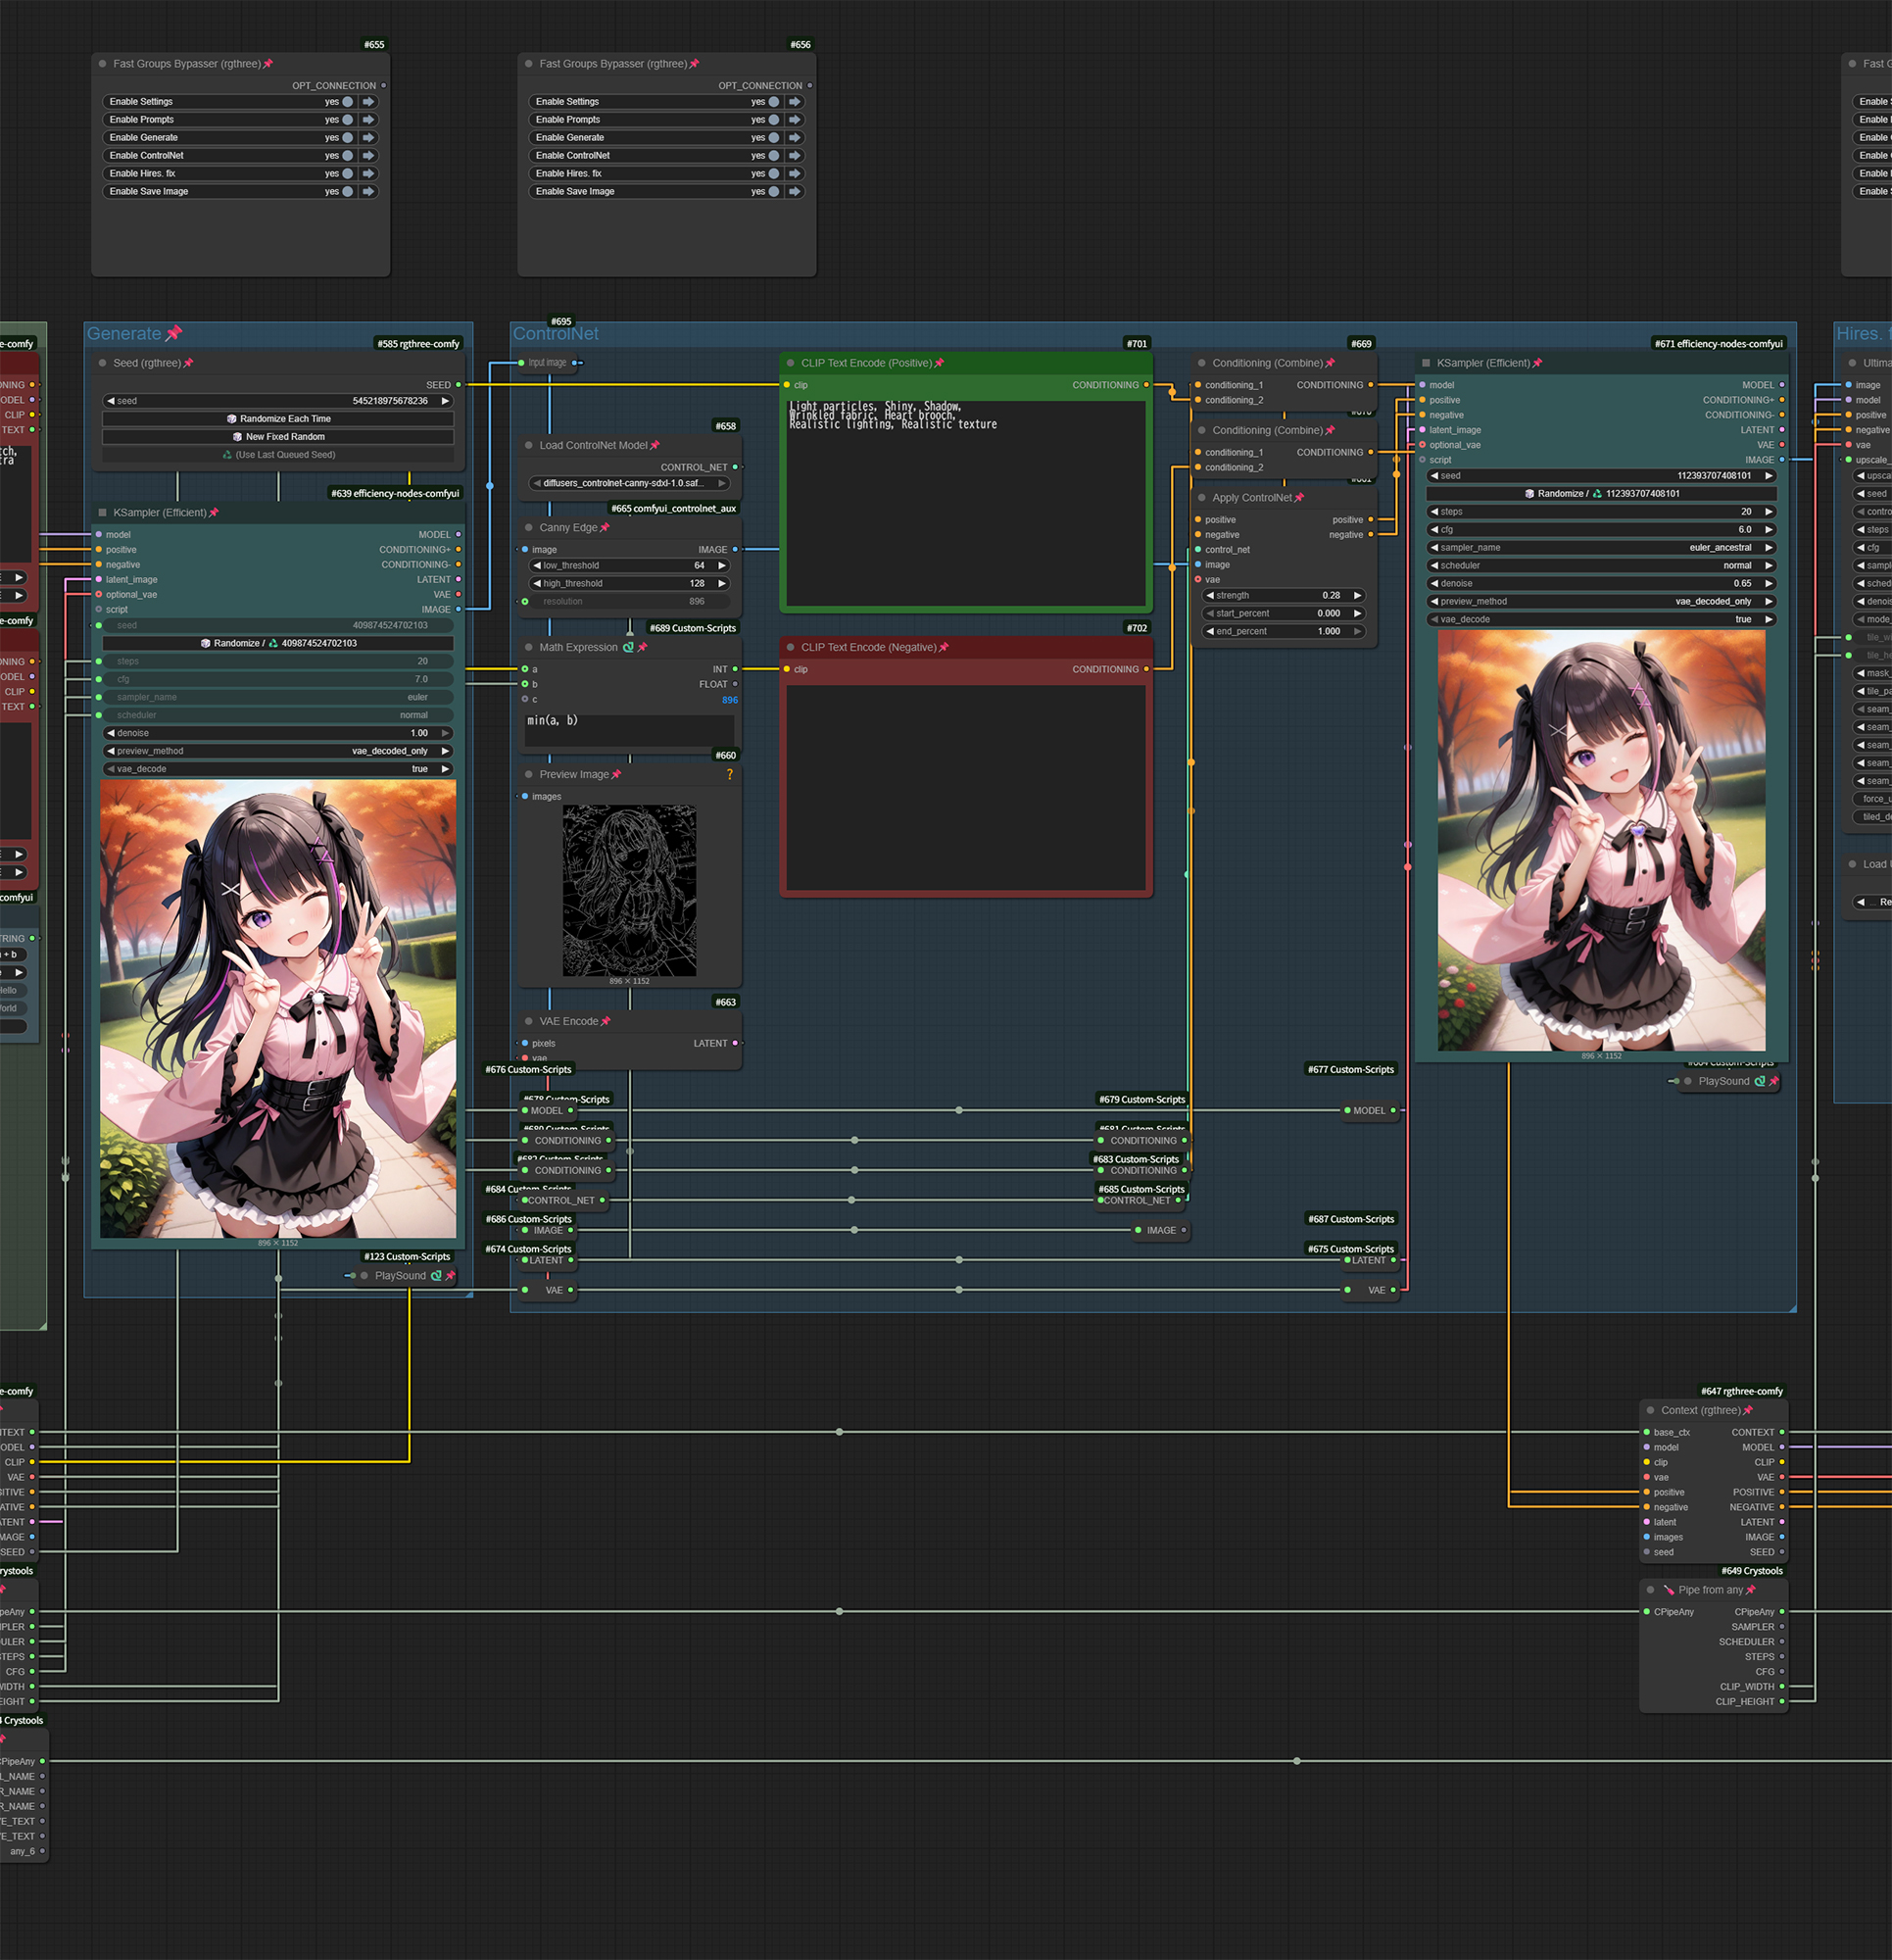
このワークフローは、テキストからの画像生成(t2i)をベースに、ControlNet Cannyによるディテールアップ、アップスケール、そしてHires. fixを組み合わせることで、元画像から高精細な画像を生成します。
お好みで、設定のLite Graphで、グラフを「隠す」にするとすっきりとして見やすいです。
前提条件
ComfyUIとComfyUI-Managerがインストールされている。
カスタムノード
以下のカスタムノードを使用しています。
動作確認をしたバージョン
ComfyUI 0.23.0
ComfyUI-Manager 3.0.1
comfyui_controlnet_aux 1.1.5
ComfyUI-Crystools 1.27.4
ComfyUI Image Saver 1.23.0
ComfyUI_UltimateSDUpscale 1.7.2
Deno Custom Nodes 0.7.54
efficiency-nodes-comfyui 1.0.9
rgthree-comfy 1.0.2606200020
このワークフローの使い方
上部にある「Fast Groups Muter (rgthree)」ノードは、各グループの有効/無効を切り替えるのに便利です。例えば、リトライする場合などに活用してください。「->」ボタンをクリックすると、そのグループにジャンプできます。
グループごとの設定方法
Settingsグループ
このグループでは、以下の項目を設定します。Checkpoint
CLIP Set Last Layer(CLIP Skip)
Sampler
Scheduler
Steps
CFG
画像サイズ
Promptsグループ
プロンプトを入力します。プロンプトが複数に分かれているのは、SDWebUIのBREAK構文と同様に、75トークン制限を回避し、プロンプトの効果を高めるためです。Generateグループ
ここでは、「Seed (rgthree)」ノードでSeed値を設定します。「KSampler (Efficient)」ノードのSeedは使用されません。(任意)Save t2i Imageグループ
生成されたt2i画像の保存設定を行います。「Image Saver」ノードが2つあります。左側のノード: プロンプトが埋め込まれたPNG形式と、ワークフローがJSON形式で切り離されたファイルを保存します。
右側のノード: プロンプトやワークフローが埋め込まれていないJPEG形式で画像を保存します。
t2i画像の生成が目的の場合、以降のステップの実行は必要ありません。
ControlNetグループ
t2i画像をControlNetで再処理してからHires.fixへ送る場合に有効にします。※このグループが無効な場合、t2i出力が直接Hires.fixへ接続されます。
このグループは複数のステップに分かれています。
ステップ1: 「Load ControlNet Model」ノードにCannyモデルを設定します。モデルをお持ちでない場合は、Hugging Faceからdiffusion_pytorch_model.fp16.safetensorsをダウンロードしてください。ファイル名をCannyモデルだと分かるようにリネームしておくと管理が楽になります。
※Cannyモデル以外のモデル(Soft Edgeなど)を使用したい場合は、ワークフローを組み替えてください。ステップ2: ディテールアップを行うためのプロンプトを入力します。
ステップ3: 「Canny Edge」ノードのパラメーターを調整してください。設定が分からない場合は、デフォルトのままで問題ありません。
ステップ4: 「Apply ControlNet (Advanced)」ノードのstrengthを調整します。数値が大きいほどControlNetの効きが強くなります。これも設定が分からない場合は、デフォルトのままで構いません。
ステップ5: 「KSampler (Efficient)」ノードでSteps、CFG、Sampler、Scheduler、Denoiseを設定します。Denoiseが大きいほど、元画像(t2i)からの変化が大きくなります。筆者は通常、0.35を使用しています。
Hires. fixグループ
このグループも複数のステップに分かれています。ステップ1: 「Load Upscale Model」ノードに使用するアップスケーラーを設定します。筆者はイラスト生成が多いため、RealESRGAN_x4plus_anime_6B (Real-ESRGAN GitHub Releases)をよく使います。
ステップ2: 「Ultimate SD Upscale」ノードにSteps、CFG、Sampler、Scheduler、Denoiseを設定します。Denoiseが大きいと、元画像からの変化が大きくなります。筆者は通常、0.10を使用しています。
※Seedは固定・ランダムどちらでも構いません。ただし、Seedを固定しておくと、Hires. fixのリトライ時にアップスケールが再度実行されないため、時間を節約できます。ステップ3: 「KSampler (Efficient)」ノードでSteps、CFG、Sampler、Scheduler、Denoiseを設定します。Denoiseが大きいと元画像(Ultimate SD Upscaleで生成された画像)からの変化も大きくなります。筆者は通常、0.20を使用しますが、画像が破綻する場合は0.10に下げます。
Save Imageグループ
生成された画像の保存設定を行います。「Image Saver」ノードが2つあります。左側のノード: プロンプトが埋め込まれたPNG形式と、ワークフローがJSON形式で切り離されたファイルを保存します。
右側のノード: プロンプトやワークフローが埋め込まれていないJPEG形式で画像を保存します。
筆者は、PNGはCivitaiや画像公開サイトに、JPEGはSNS投稿に使い分けています。
最終ステップ
最後に、ワークフローを実行して画像を生成します。
ポイント
ワークフローは最初から最後まで一気に実行しても構いませんが、「Fast Groups Muter (rgthree)」ノードでグループの有効/無効を切り替えながら、一つずつ試すことをお勧めします。
良い結果が得られた段階でシードを固定する方法を取ると、リトライがしやすくなります。
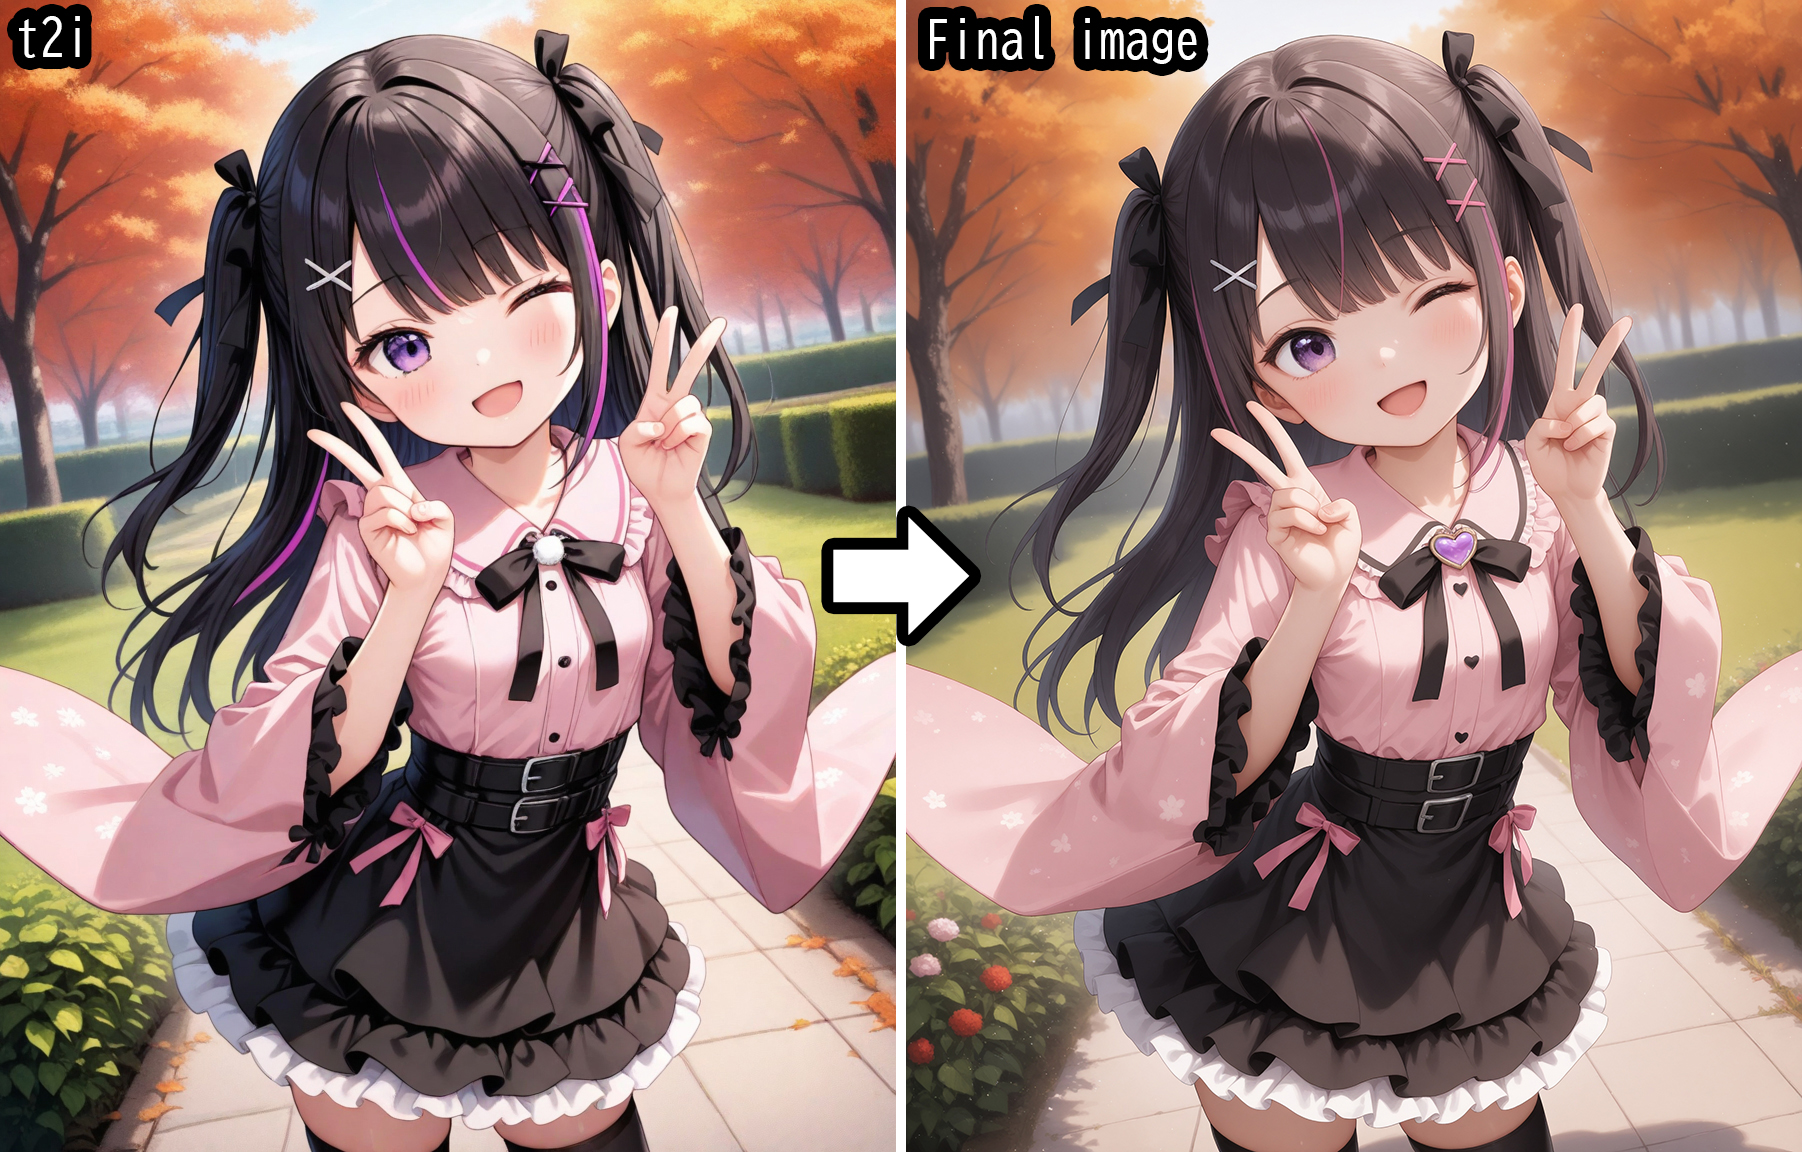
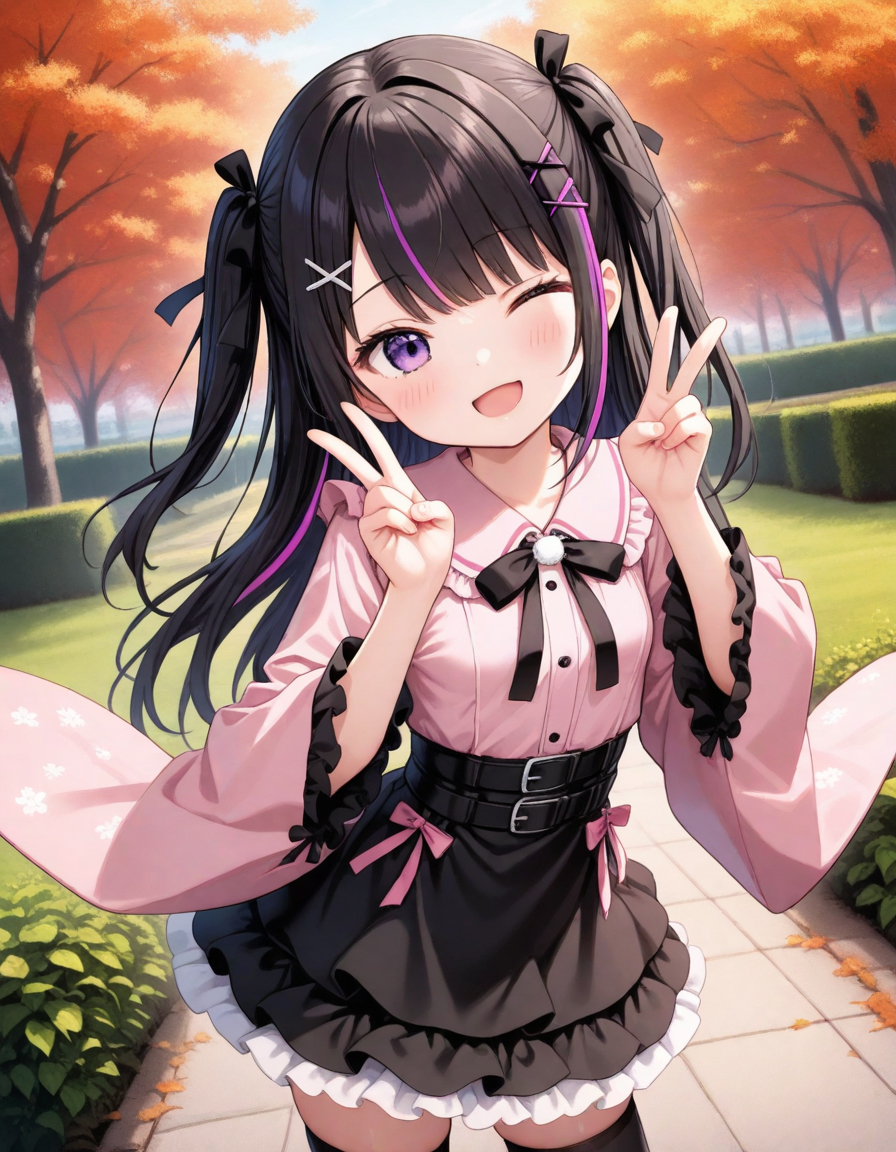
サンプル画像について
サンプル画像では、以下の方法で元の画像(t2i)に手を加えています。
「ControlNetグループ」のプロンプトに「Realistic lighting, Realistic texture」を追加し、リアルな質感を少しだけ加えています。
This is my daily driver ComfyUI workflow that I use regularly. Feel free to customize it to your liking.
This workflow generates high-resolution images from a base image by combining text-to-image (t2i) generation with ControlNet Canny for detail enhancement, upscaling, and Hires. fix.
If you prefer a cleaner look, you can set the Graph to "Hidden" under Lite Graph in the Settings.
Prerequisites
ComfyUI and ComfyUI-Manager are installed.
Custom nodes
The following custom nodes are used.
Confirmed Working Versions
ComfyUI 0.23.0
ComfyUI-Manager 3.0.1
comfyui_controlnet_aux 1.1.5
ComfyUI-Crystools 1.27.4
ComfyUI Image Saver 1.23.0
ComfyUI_UltimateSDUpscale 1.7.2
Deno Custom Nodes 0.7.54
efficiency-nodes-comfyui 1.0.9
rgthree-comfy 1.0.2606200020
How to Use the ComfyUI Workflow
The "Fast Groups Muter (rgthree)" node at the top is useful for enabling and disabling each group. For example, you can use it when you need to retry a generation. Click the "->" button to jump to that specific group.
Settings for Each Group
Settings Group
In this group, you'll set the following items:Checkpoint
CLIP Set Last Layer(CLIP Skip)
Sampler
Scheduler
Steps
CFG
Image size
Prompts Group
Enter your prompts here. The prompts are divided into multiple sections to avoid the 75-token limit and enhance the effect of the prompts, similar to the BREAK syntax in SDWebUI.Generate Group
Set the Seed value using the "Seed (rgthree)" node. The seed in the "KSampler (Efficient)" node is not used.(Optional) Save t2i Image Group
Configure the settings for saving the generated images. There are two "Image Saver" nodes.The left node: Saves the workflow as a JSON file and the image as a PNG with the prompts embedded.
The right node: Saves the image as a JPEG without any embedded prompts or workflow data.
If your goal is only to generate T2I images, you do not need to proceed with the subsequent steps.
ControlNet Group
Enable this to process the t2i image through ControlNet before Hires.fix.Note: If this group is disabled, the t2i output will be connected directly to Hires.fix.
This group is divided into multiple steps.
Step 1: Set the Canny model in the "Load ControlNet Model" node. If you don't have the model, you can download diffusion_pytorch_model.fp16.safetensors from Hugging Face. It's a good idea to rename the file to make it easily identifiable as a Canny model.
Note: You don't have to use a Canny model. If you want to use a different model like Soft Edge, you can modify the workflow.Step 2: Enter the prompts for adding detail.
Step 3: Adjust the parameters of the "Canny Edge" node to your liking. If you're not sure, the default settings are fine.
Step 4: Adjust the strength of the "Apply ControlNet (Advanced)" node. A higher value increases the effect of ControlNet. The default setting is okay if you're unsure.
Step 5: Set the Steps, cfg, Sampler, Scheduler, and Denoise in the "KSampler (Efficient)" node. A higher Denoise value results in a greater change from the original image (t2i). I typically use 0.35.
Hires. fix Group
This group is also divided into multiple steps.Step 1: Set the upscaler model in the "Load Upscale Model" node. The choice depends on the purpose of your image, but since I often generate illustrations, I frequently use RealESRGAN_x4plus_anime_6B (Real-ESRGAN GitHub Releases).
Step 2: Set the Steps, CFG, Sampler, Scheduler, and Denoise in the "Ultimate SD Upscale" node. A higher Denoise value will result in a greater change from the original image. I typically use 0.10.
Note: You can set the seed to be either fixed or random. However, fixing the seed saves time, as the upscaling process won't be re-executed when you retry the Hires. fix step.Step 3: Set the Steps, CFG, Sampler, Scheduler, and Denoise in the "KSampler (Efficient)" node. A higher Denoise value also results in a greater change from the original image (Generated by the Ultimate SD Upscale node). I typically use 0.20, but I lower it to 0.10 if the image starts to look distorted.
Save Image Group
Configure the settings for saving the generated images. There are two "Image Saver" nodes.The left node: Saves the workflow as a JSON file and the image as a PNG with the prompts embedded.
The right node: Saves the image as a JPEG without any embedded prompts or workflow data.
I use the PNG format for platforms like Civitai and other image-sharing sites, and the JPEG format for social media posts.
Final Step
Finally, execute the workflow to generate your image.
Point
You can run the entire workflow from start to finish, but I recommend testing it step by step by enabling and disabling groups using the "Fast Groups Muter (rgthree)" node.
If you get a good result, you can lock the seed at that point, which makes it easier to retry and make further adjustments.
About the Sample Image
This sample image was modified from the original (t2i) using the following methods:
The prompts "Realistic lighting, Realistic texture" were added to the "ControlNet group" to give it a slightly more realistic texture.
The English translation of this workflow description was created with the help of Gemini.