


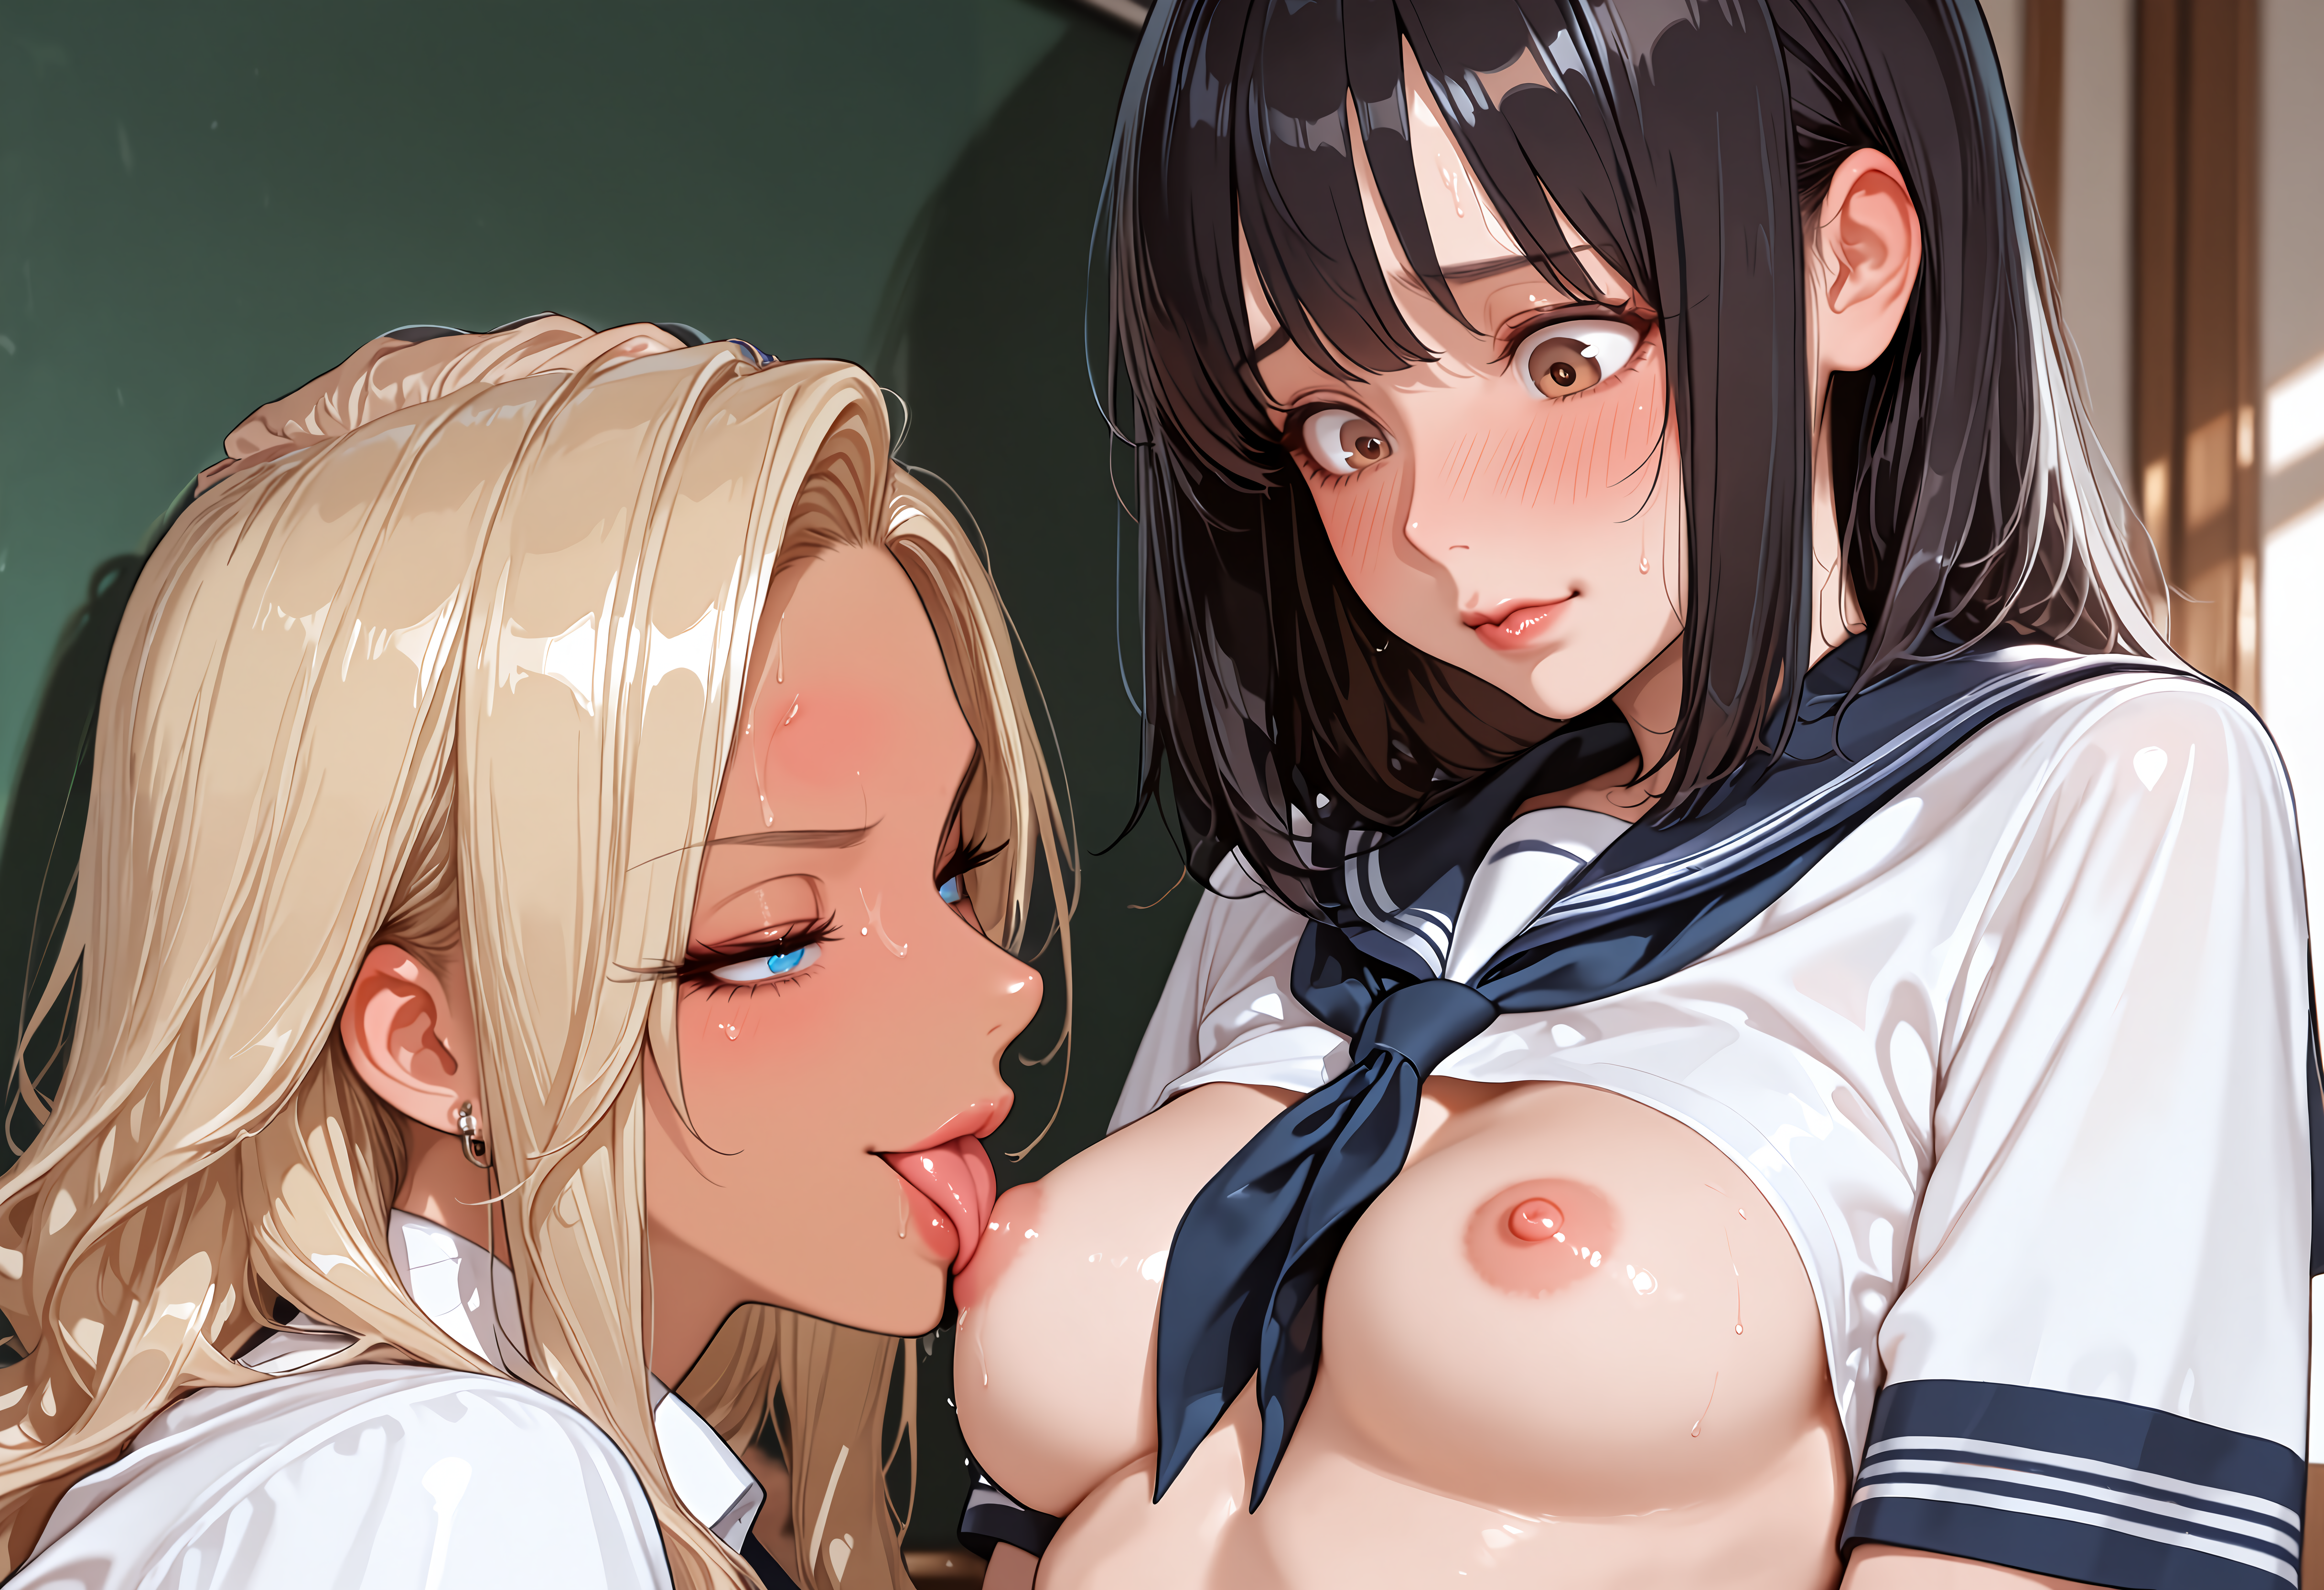


Regional prompt workflow for XL Models
This is a combination of some workflow I'v used in the past or recently.
Most of the part from the regional prompt was originally on this workflow
Huge thx to @zml_w for all the testing and the help
I'v just found that Levpat might be banned or deleted account
Upscale Method for V2 by @LevPat
https://civarchive.com/models/1994653/custom-upscale-flow
USER GUIDE
https://civarchive.com/articles/18257
For V3 Merged Workflow
Merged the two method into one workflow, you can now toggle between Dense Diffusion and Attention couple
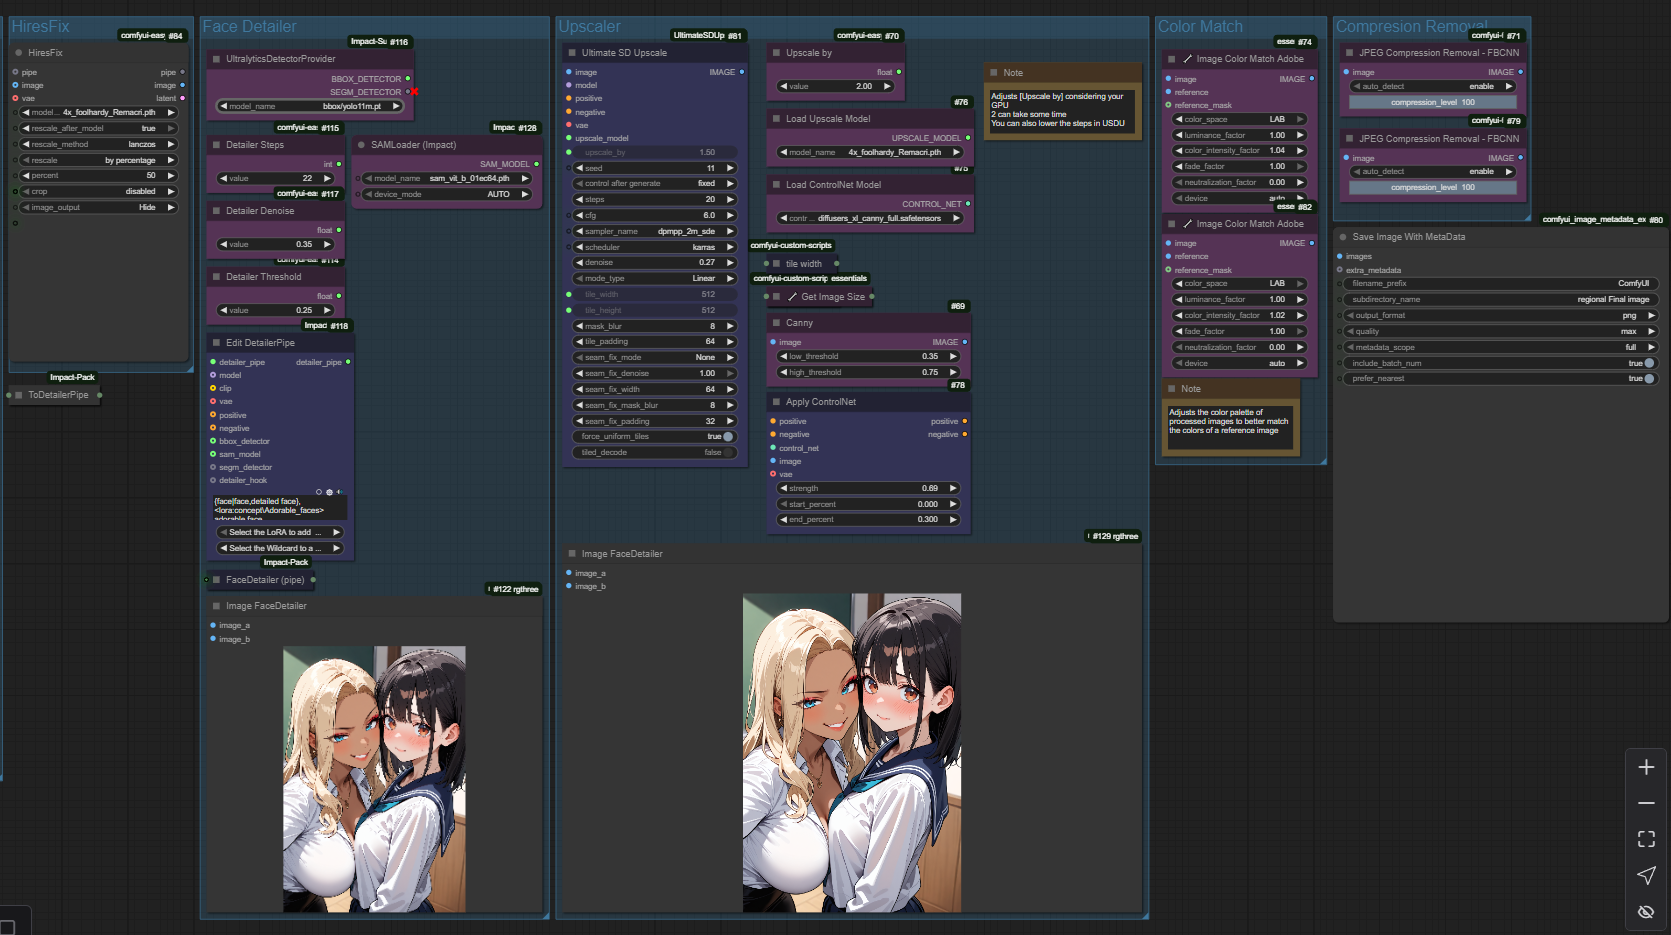
Changed the detailer method, I'v kept Couple Face Detail group (for some image it's ok)
Now I'm mostly using a method from MGHerder
Found on this workflow
Added some settings to the Face detailer, I'v linked all the merged text prompt to the positive on the first two SEGS for each two characters, you can swicth between character (I couldn't find a good way to had wildcard or overwrite prompt on the SEGS detailer)
Added SeedVr2 upscale you will need to download the model and VAE for it to work
Added a more simple and lighter latent Upscale
I'v kept the Advanced latent upscale (was called Crazy Upscale before) linked all the text positive and negative prompt to it, converted to subgraph all the noodles
Kept the USDU upscale in some use it can be good too
Basically you have now 4 upscale method to choose with, you can delete the Upscale group you don't want it will not break the workflow.
You will need all the the custom nodes below that was used for V2 and all the following
https://github.com/numz/ComfyUI-SeedVR2_VideoUpscaler (If you want to use it)
https://github.com/mcmonkeyprojects/sd-dynamic-thresholding
https://github.com/chrisgoringe/cg-use-everywhere
https://github.com/BlenderNeko/ComfyUI_ADV_CLIP_emb
https://github.com/LAOGOU-666/Comfyui-Memory_Cleanup
https://github.com/Extraltodeus/Skimmed_CFG
https://github.com/mirabarukaso/ComfyUI_Mira
https://github.com/ltdrdata/was-node-suite-comfyui
FOR V2 Dense Diffusion and Attention Couple
I'v made two separate workflow with different Regional prompt method, both of them are in the archive if you want to try.
Dense Diffusion
So the error "The size of tensor a (924) must match the size of tensor b (308) at non-singleton dimension 3"
Is still here with Dense Diffusion BUT now I know 100% why it happens, so I will detail everythings how to avoid it.
First you can put almost everything in every positive prompt, a lot of detail or action for left char and almost nothing for 2nd character will not trigger this error.
The only way this error will pop is Positive VS Negative Prompt.
So why it happens then, almost exclusivly with Embedings, because of Tokens count and the way Dense Diffusion work, the size of Tokens need to be almost the same, and when you put emebeddings, like Lazyhand, Lazyneg, etc will use a lot of Tokens (more exactly tokens Chunks)
So how to avoid it, you can either not use emebeddings at all, I'v added note on the workflow with good (I think) quality prompt.
You can still use Embeddings but you wiil need to balance them between positive and Negative. So for example if you put Lazyhand + Lazyneg in Negative, you will need to use at least one or more embeddings in the positive quality to get the same size of Tokens chunks.
So because of that I'v added a custom nodes made by me (and GPT) to Normalize the negative quality, you can either turn it off or on, I'v put pics for comparaison in the archive.
If you'r not happy or don't like this method I'v made another Workflow with a different nodes called Attention couple.
Attention Couple
With Attention Couple this error will never pop, then why not using it and getting rid of Dense Diffusion ?
Attention couple work great and can have pretty good result, but in my testing I saw two major flaw with it.
First the Lora did not get applied the same way with it, Dense Diffusion seems to have a better blend for the model and loras.
Second the interaction seems more difficult too, I did not use it very extensively but the few image I'v made seems to have less prompt adherence.
Here is every nodes you will need for both
For Dense Diffusion
https://github.com/Fannovel16/comfyui_controlnet_aux
https://github.com/ltdrdata/ComfyUI-Impact-Pack
https://github.com/rgthree/rgthree-comfy
https://github.com/yolain/ComfyUI-Easy-Use
https://github.com/kijai/ComfyUI-KJNodes
https://github.com/ssitu/ComfyUI_UltimateSDUpscale
https://github.com/cubiq/ComfyUI_essentials
https://github.com/ClownsharkBatwing/RES4LYF
https://github.com/giriss/comfy-image-saver
https://github.com/shiimizu/ComfyUI_smZNodes
https://github.com/ltdrdata/ComfyUI-Impact-Subpack
https://github.com/huchenlei/ComfyUI_densediffusion
https://github.com/edelvarden/comfyui_image_metadata_extension
https://github.com/rcsaquino/comfyui-custom-nodes
https://github.com/zml-w/ComfyUI-ZML-Image
(https://github.com/zml-w/ZZZ_ZML_English_Patch)
A small custom node is in the archive for the Negative Normalization, just need to put it in custom nodes folder. No requirements needed.
For Attention Couple
Everythings above +
https://github.com/BlenderNeko/ComfyUI_ADV_CLIP_emb
https://github.com/laksjdjf/cgem156-ComfyUI
If you have trouble with FAILED IMPORT for cgem156 you can try this fix
https://github.com/laksjdjf/cgem156-ComfyUI/issues/17#issuecomment-2918745574
Worked for me with ComfyUI desktop App
Older Version
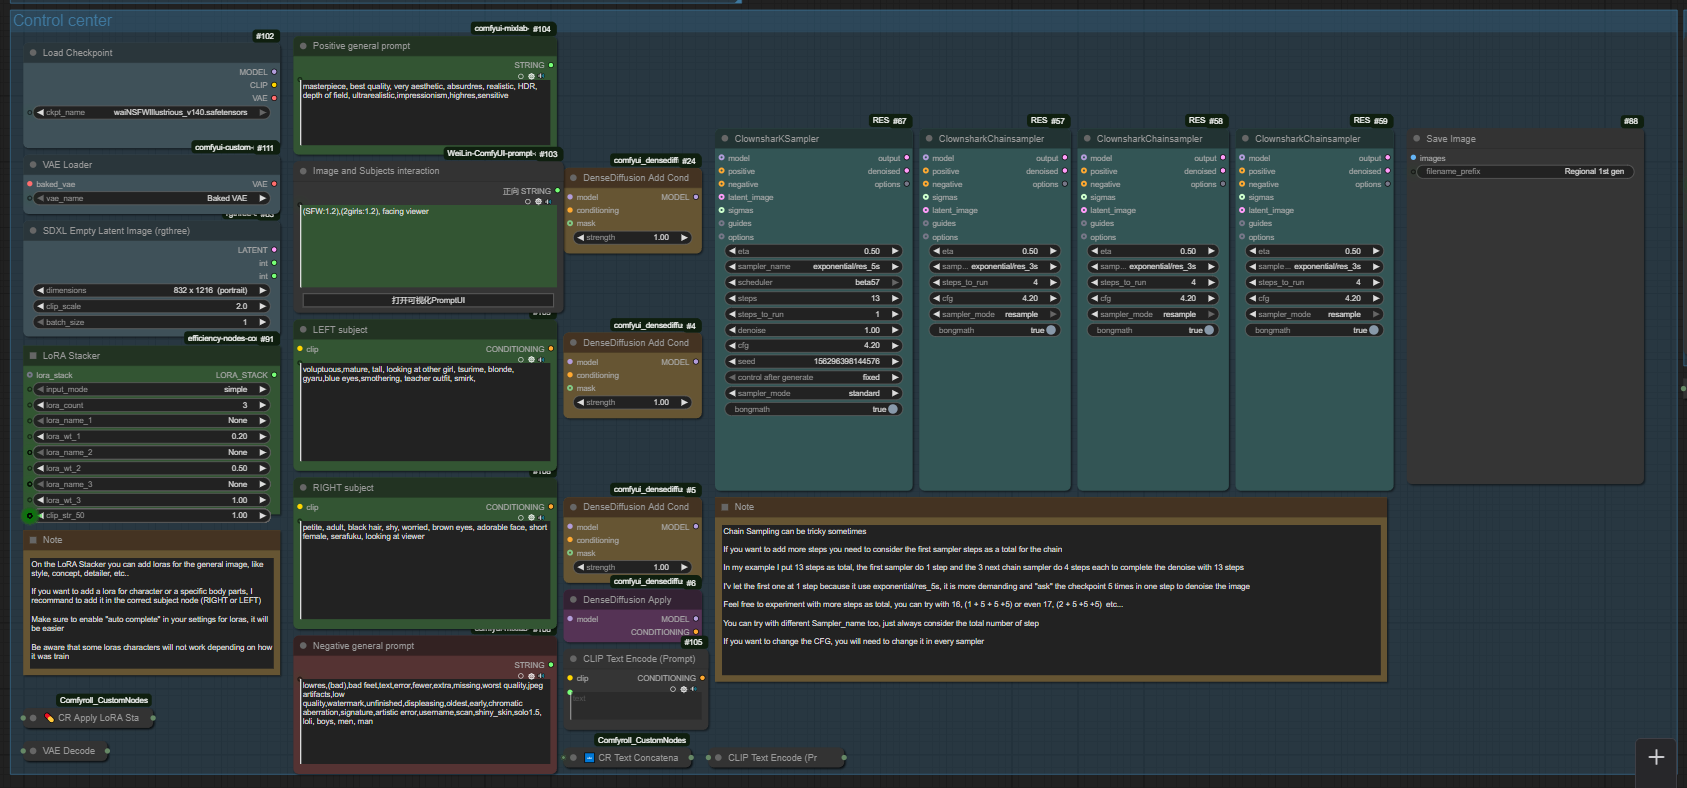
I'v added a chain sampler because I love this method, the render time and the result it gave.
This is quiet an advanced workflow so you will need a lot of custom nodes, some may not work with ComfyUI manager, I will link them here if you want to install manually.
Make sure you activate your venv environment for the requirements.txt for custom nodes.
There is a simplified version in the archive if you want to try without all the nodes for HiresFix, Face detailer, upscale and color match.
I'm not responsible if you break your ComfyUI install, some of the nodes may use different Pytorch version or requirements you already use.
https://github.com/ltdrdata/ComfyUI-Impact-Pack
https://github.com/pythongosssss/ComfyUI-Custom-Scripts
https://github.com/rgthree/rgthree-comfy
https://github.com/yolain/ComfyUI-Easy-Use
https://github.com/shadowcz007/comfyui-mixlab-nodes
https://github.com/jags111/efficiency-nodes-comfyui
https://github.com/ssitu/ComfyUI_UltimateSDUpscale
https://github.com/Suzie1/ComfyUI_Comfyroll_CustomNodes
https://github.com/cubiq/ComfyUI_essentials
https://github.com/ClownsharkBatwing/RES4LYF
https://github.com/ltdrdata/ComfyUI-Impact-Subpack
https://github.com/huchenlei/ComfyUI_densediffusion
https://github.com/edelvarden/comfyui_image_metadata_extension
https://github.com/Miosp/ComfyUI-FBCNN
https://github.com/rcsaquino/comfyui-custom-nodes
https://github.com/weilin9999/WeiLin-ComfyUI-prompt-all-in-one
Deprecated version use this one instead, I'v fixed the workflow with the new one
https://github.com/weilin9999/WeiLin-Comfyui-Tools
For V1 Multimask
https://github.com/chflame163/ComfyUI_LayerStyle
https://github.com/kijai/ComfyUI-KJNodes
https://github.com/chrisgoringe/cg-use-everywhere
https://github.com/giriss/comfy-image-saver
Description
V1.0
FAQ
Comments (12)
(=・ω・=)
Thx for all of your workflow friend, I'm trying to change it with your multi mask method for horizontal, vertical and diagonal mask because I really liked this one.
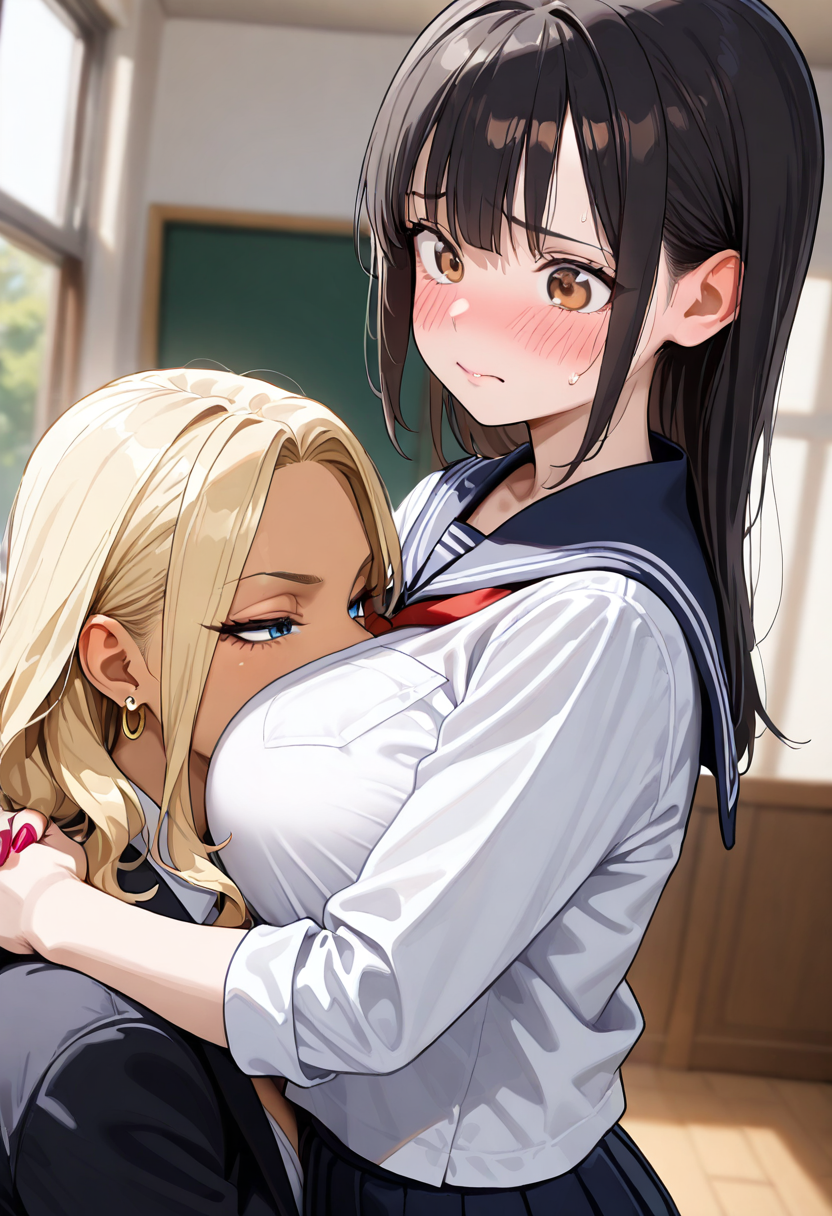
hmmmmmnike Thank you for your like. However, I need to remind you that the effect of the horizontal mask is not good, and the model cannot understand this composition. Among the automatically generated masks, I recommend the vertical one the most, followed by the diagonal one. If you want a better effect, manually drawing the mask is a good method. I use the vertical mask by default for convenience. Of course, if you first generate a base image and then use it as a background image to input to ControlNet for image generation, the effect will be even better! I did this in the "three people and pseudo five people" version. The only drawback is that the process is too complicated...
@hmmmmmnike
I saw the version information you wrote. It seems the error "The size of tensor a (924) must match the size of tensor b (308) at non-singleton dimension 3" has you confused. I don't know the specific reason for it either, but what I do know is that this situation only occurs with the "精简版" workflow. Perhaps I made a mistake when I was building the workflow before. If you want to solve this error, you could try using other versions and modifying them instead.
One more thing, the "weilin" node used in your workflow is now obsolete—the one for selecting prompts with tags. This will prevent others from installing the plugin when they use your workflow. Therefore, it would be best to replace it with another node or use the latest version of "weilin." ("weilin" currently has two versions: the old one you are using, whose files on GitHub are no longer complete and cannot be downloaded, and a new version that is still being updated.)
@zml_w thank you very much for all of this information, I wasn't aware for the Weilin node because I'm always keeping my old node files somewhere, I will update it as soon as I can.
Ok for the error I will try to check your other workflow to see if I can get rid of it or replicate with the multi mask method.
I'm trying to incorporate clownshark regional conditioning in it, but wasn't able to get it to work properly like I want. If you want to check you can look at their github page.
@hmmmmmnike REGIONAL CONDITIONING? It looks like it's just simply combining multiple conditional masks, and the masking logic hasn't changed, making it the same as the official "Conditioning (Set Mask)" node. The reason our previous workflow performed so well was entirely dependent on the "comfyui_densediffusion" node, which is irreplaceable for two-person generation.
@hmmmmmnike If you are still interested in "diagonal masks," you can try this node: "https://github.com/zml-w/ComfyUI-ZML-Image". Its "遮罩分割" node supports rapid switching between "vertical, horizontal, and diagonal" masks, requiring only a single parameter change in the node!! No more need for a bunch of complex nodes and hard-to-manage connections for switching masks. You can also refer to my newly released "优化版" workflow. However, currently, this custom node is only available in Chinese.
@zml_w Thank you, Yes I'v try your last workflow you mentioned and didn't understand the Zml node haha
I wasn't brave enough to translate everything on ZML nodes github page, but this very encouraging to see those nodes gaining more popularity. I will try to dig deeper on your last workflow (and the 5 characters workflow too) and study the logic behind it. But i need some free time.
And sorry I didn't see your comment for the regional conditioning from RES4LYF, my idea was to use it more as a prompt condition "helper" to have better result wihtout trying to find a good seed. If you say it's the same there is cleary no real reason to add those (and I didn't find a way to link them with their sampler and densediffusion in the same workflow)
Just to make it clear I'm mostly guessing things and try different combination from other workflow I find, I'm not really advanced and I just try to experiment things with ComfyUI. As always thank you really much for your messages.
@hmmmmmnike
You're welcome, I'm happy to help.
The ZML nodes have now been updated with English support. You can download the English patch here: https://github.com/zml-w/ZZZ_ZML_English_Patch
The workflow for five characters is actually for three, with the other two generated via image expansion. This approach is more stable and allows for separate control of their poses. For more than three characters, I recommend using image-to-image, as it's more convenient. When the number of characters increases, text-to-image results are often unsatisfactory and inefficient.
For 2-3 characters, "comfyui_densediffusion" works perfectly! For 3+ characters, I only recommend image-to-image; it's currently the most suitable method I've found for SDXL.
@zml_w wow thank you so much for the English version, I will check it out this week end.
@hmmmmmnike I just tested and found a bug... some nodes are not working properly, including the mask node... I tried to fix it but couldn't, so it might have to wait for later...
@hmmmmmnike I have successfully fixed it! You can easily switch between "vertical, horizontal, and diagonal" masks using the "ZML_Mask Split" node!