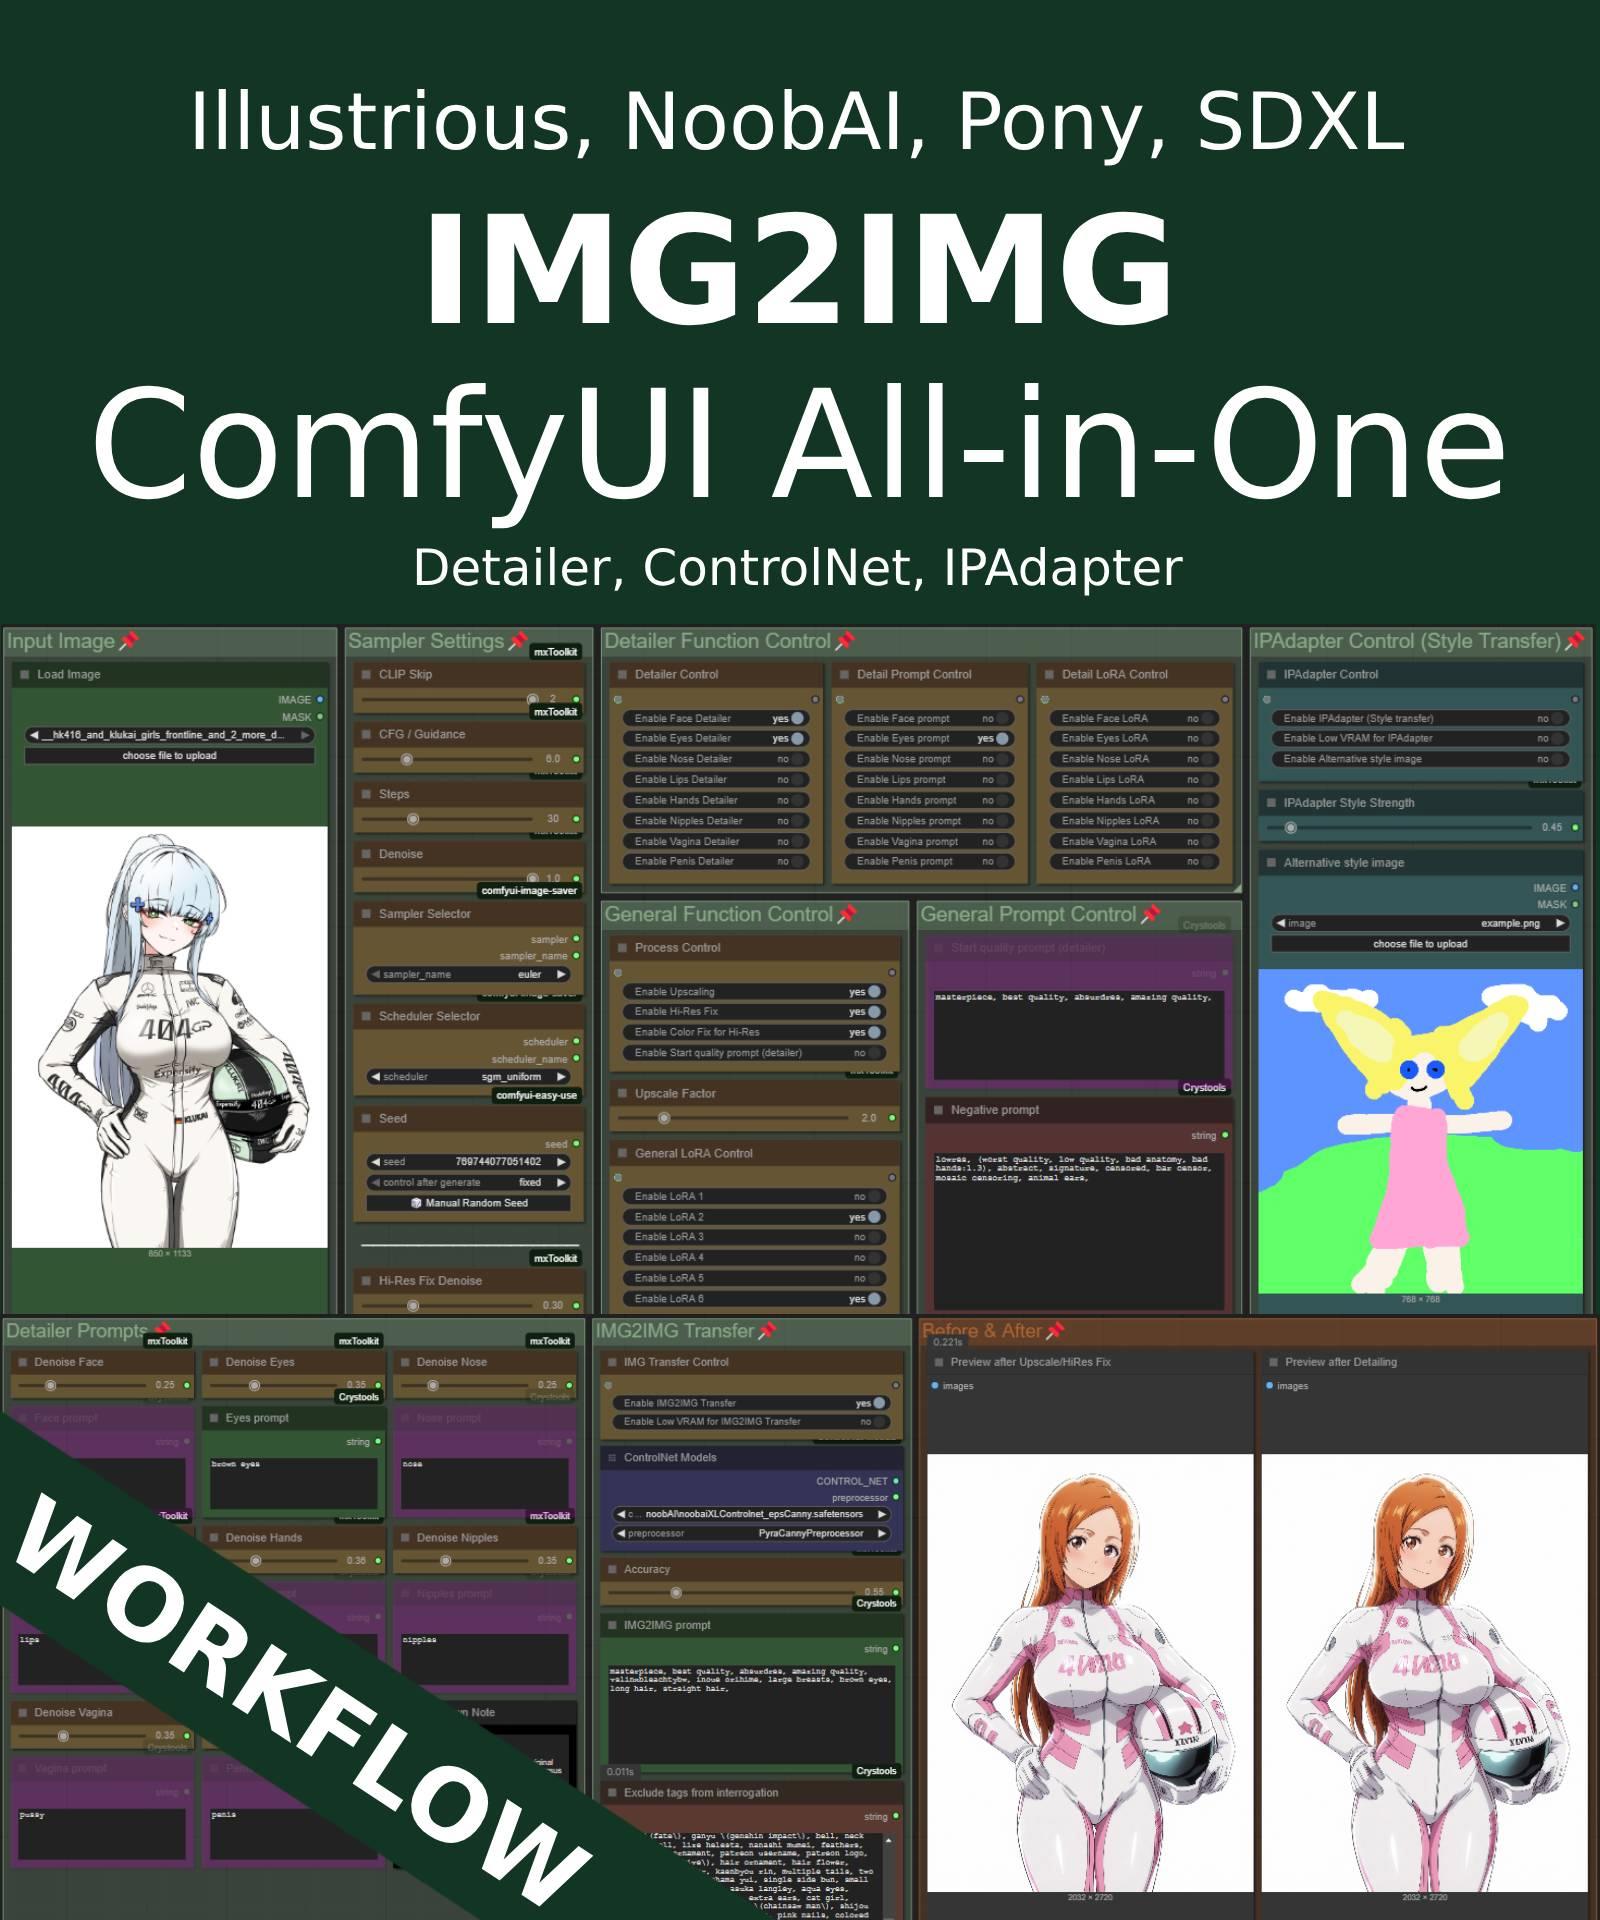

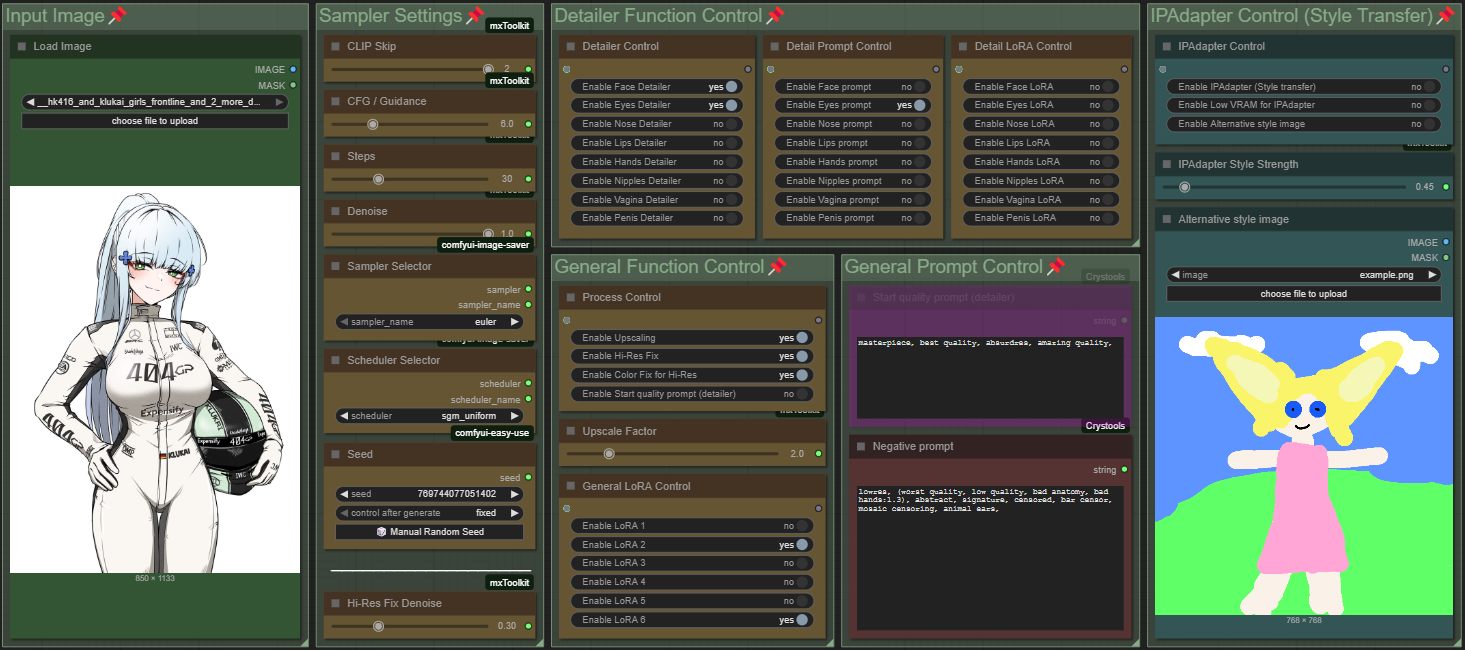
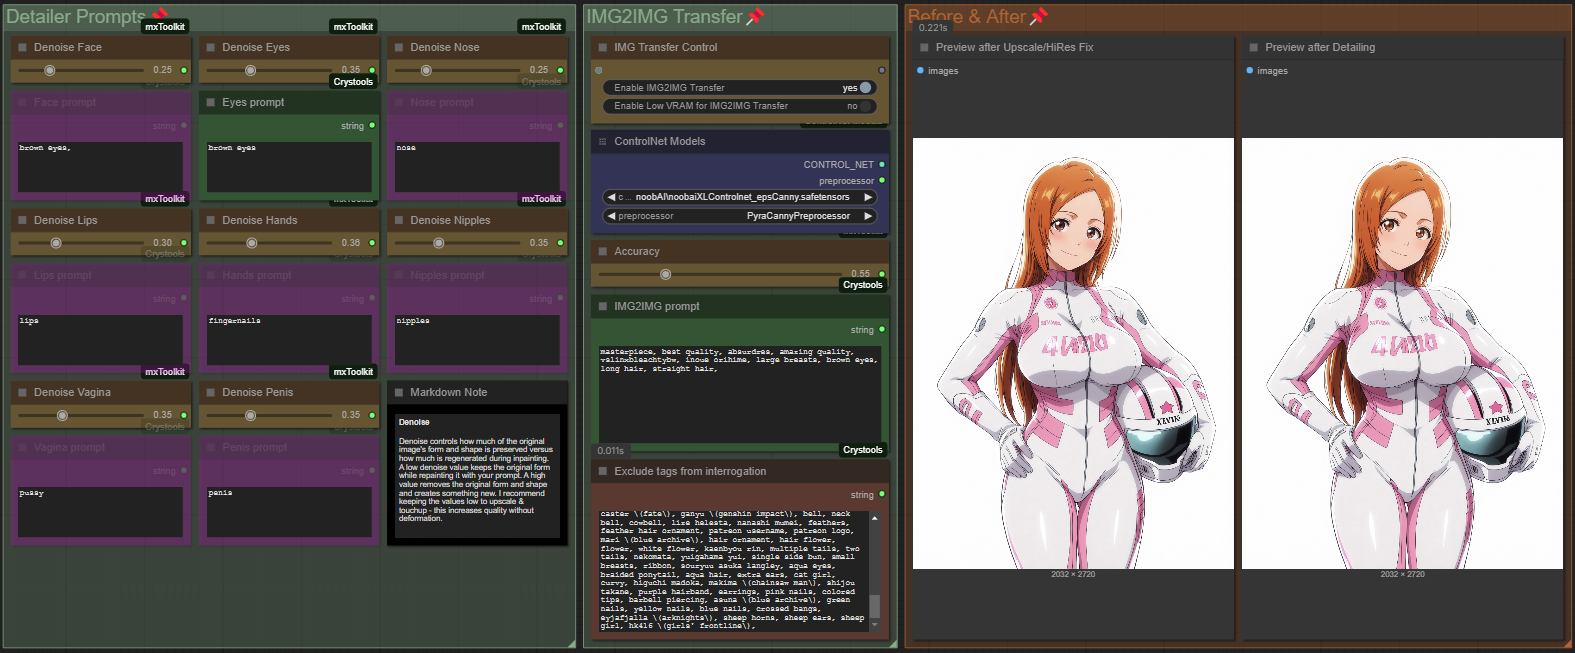
ComfyUI Detailer/ADetailer Workflow
If you're having ANY issues with this workflow, please include the error log from your console when writing a comment here on this page. Chances are 99.98% i can help you with your issue - but i need the error log. And me not having to ask for it first will save you potentially hours. Chances are also high the solution to your problem is already documented in the FAQ here.
You can now support me on my Ko-Fi if you have too much money (✿◡‿◡)
Requirements for each version are listed below or can be found inside a Note in the Workflow itself.
Because of the many connections among the nodes, I highly recommend turning off the link visibility by clicking the "Toggle Link visibility" (Eye icon) in the bottom right of ComfyUI.

Description
I originally came from A1111 WebUI to ComfyUI and, honestly, a lot of things felt way more complicated than they needed to be. I couldn’t find workflows that were both visually pleasing and showed me all the important options without requiring a deep understanding of every little thing in ComfyUI.
Over a few months I learned the ins and outs of Comfy and built my own very barebones, simple workflow (v1) with one main goal: streamline the process and make it visually understandable. I released it here thinking it might help others who also want to make the jump from A1111 to Comfy.
Over the last year I’ve kept adding more and more features as people started using the workflow and requesting things. The workflow has grown a lot, but I’m still trying to keep the same ease-of-use that this whole journey started with. The main goal is still the same: give you a lot of powerful options in a layout that’s as clean, readable, and as user-friendly as ComfyUI will allow.
At this point I feel like I have a pretty solid understanding of how Comfy works, and I’ve even created my own custom nodes to add missing functionality so this workflow could match the ideas I had for it. I try to hide as much of the technical complexity as possible — but if you’re ever curious or confused about anything, please feel free to ask!
Thanks to all of your suggestions, the workflow now includes features like:
Single-image and batch generation
Automatic detailers for specific body parts
Upscaling
v-pred models
LoRAs
ControlNet
IPAdapter
Hires fix / refiner
Manual inpainting
Thank you to every single person who uses this workflow, donates Buzz, or shares images on this page.
I really appreciate you taking those extra steps to support and promote the project. ♥️
Requirements
v4.4 and above require ComfyUI version 0.3.51 or above and also need the frontend to be AT LEAST 1.24.3 or later.
v5.1 - Full List
v5.0 - Full List
v4.4 - Additions to v4.3 (IMG2IMG Only)
Otherwise same as v4-4.3 below
v4.2-4.3 - Additions to v4.1
Otherwise same as v4.1 (incl. v4) below
v4.1 - Additions to v4 (IMG2IMG Only)
Otherwise same as v4 below
v4 - Full List
v3 - v3.2 - Full List
v2.2 - Additions to v2
Otherwise same Custom-Nodes as v2 but you can remove Comfyui-ergouzi-Nodes
v2 - Full List
v1 - Full List
How to use
Since all of the different versions work differently, you should check the "How to use" Node inside of the Workflow itself.
I promise that once you read the explanation of the workflow itself, it'll click and it will be a simple plug and play experience.
It's the simplest I could've made it coming from someone who's only started using ComfyUI 4-5 months ago and had been exclusively an A1111WebUI user before.
When were what functionalitys added?
Starting from v3, ControlNet is included.
Starting from v4, IPAdapter is included.
Starting from v4.3, HiRes Fix and Dynamic prompts(wildcards) is included.
Starting from v4.4, Refiner is included.
Starting from v5.0, Manual Inpainting is included.
Any errors during execution?
If you're running into any errors during the execution of the workflow, please check the FAQ of my Guide first. The guide is written for the IMG2IMG Workflow but when issues arise that people run into frequently i'll add the solutions and what's hapenning to that FAQ section.
If you can't find the problem you're running into there - feel free to write me a comment on the model page so that i can help you and other people might benefit from it as well.
Feedback
I'd love to see your feedback or opinion on the workflow.
This is the first workflow I have ever created myself from scratch and I'd love to hear what you think of it.
If you want to do me a huge favor, you can post your results on this Model page.
I'll make sure to send some buzz your way!
Description
added high-res fix & color fix (not recommended on upscaled images above 2x/larger than 2048x3072)
fixed IMG2IMG Transfer Sampler not using settings from "Sampler Settings"-Group
adapted guide notes in workflow
FAQ
Comments (77)
Your Lips Ultralytics using adetailer2dmouth is seg not bbox. The author even says so in a reply at the comment section in the civit link you provided.
Just worried someone clueless might try to copy exactly. Will let you know if i find anything else. Also thank you very much for this beautiful workflow and the amazing guide you put together.
Hey tiru92,
thanks for the heads-up and feeback! Glad you're enjoying the workflow and guide ♥
Have been using the mouth model for 5 months now and seemingly the creator added it last month into the title + answered it in a comment ^^
vslinx no worries mate. i probably made the same mistake too. thanks for being very responsive and friendly.
I have a question regarding controlnet, i have gone through couple of vids and workflows and in most of them they use multiple nodes(depth+canny, lineart+canny, etc) to achieve their results.
Is that method outdated now(I'm asking cause quite a number of guides on YouTube are a year old, SD scene just moves too fast to keep up with the better option) or you just find that using one node is enough to achieve similar results?
tiru92 no need to thank me! :D
Usually people only use one or the other, i haven't really seen anybody use multiple UNLESS you do manual inpainting of specific bodyparts like the hand - then some people do a second run-through of only the hand with an openpose controlnet of a hand in the pose that they want the hand to be for example. But yeah the scene moves really fast, so i wouldn't be surprised if using multiple might've been common practice in the past.
I think it can also heavily depend on the model you're using. I know that SDXL Models didn't have ControlNet Models for a while and therefore chaining two or more ControlNets with different processors like Canny, OpenPose, LineArt etc. in a chain might've gained better results than doing any one of them alone since they weren't trained well on them.
But nowadays you can easily use just one of them and adjust the strength accordingly, chaining multiple will most likely fry your results as they're being parsed into the CLIP that is responsible for the understanding of positioning in your generation.
vslinx Alright thank you very much mate. The past couple days i have just used one and i have gotten the results, just a matter of tweaking the strength. Any chance you might add in-painting in your workflow down the line?
tiru92 my pleasure! :)
Usually canny always give me the results i need, like you said it's just a matter of tweaking strengths.
In-Painting is the next big feature on the roadmap.
You can always check my intended next upcoming features in the description - they're always listed at the top. 🫡♥️
vslinx Noted, btw i have added my own inpainting group for now. Made it in your style. its still a WIP and its very basic. I didnt publish it, just saved it as draft, not sure if you can view it.
https://civitai.com/articles/18338/edited-lora
Let me know if you can access it, i will take it down once you are done.
I have one issue the inpaint node im using has a padding setting that uses combo function(its dropdown). Any idea how to connect like mxsliders connect to others, i was thinking worst case edit the node from combo to string.
tiru92 i'd have to check how to connect them :)
Sadly i can't access your article, you could also post an image that you generated with that workflow, by default the workflow will be saved with the image. So if you have uploaded it i can just drag and drop into my comfy to check it out :D
(i also already developed a prototype but some other things have gotten in between like subgraphs and some restructuring)
vslinx Ive already shared my generated image, right now its just a standalone group. Next goal is to get it hooked with controlnet and upscale, when i have the time.
tiru92 your inpaint area looks great already! if it's okay with you i'll probably steal a bit from it for the v4.5 which will have inpainting included then! 🫡♥️
vslinx please do, its my pleasure. looking forward for the next version.
vslinx i managed to get controlnet+inpaint working but with one major issue(i broke upscaling, inpainting is out of alignment) and couple of small hiccups.
Latent is no longer empty latent you cant fetch dimension for save image node. also i need to find a way to set use positive prompt node A when inpaint enabled and positive prompt node B when disabled, same goes with denoise settings img2img ksampler.
I have completed ignored ipadapter but i had fun messing with the workflow. Looks like adding inpainting is gonna require major work on your workflow, good luck mate.
tiru92 yeah i figured that'd be the case 😂
That's why it's at the end of my to-do list haha
@vslinx sorry for pestering you again but i have some questions, i realized that detailing is only done at the very end that requires upscaling enabled and completely run before detailing takes place.
It would be nice if the workflow could be like
txt2img : prompt > inpaint/controlnet/ipadapter/detailer > output > upscale+hires
img2img: image > inpaint/controlnet/ipadapter/detailer > output > upscale+hires
That way the work can be done before upscale. Unless im doing something wrong.
hey @tiru92,
you are correct in your thinking - the detailing is the last part of the workflow and happens after upscaling & the hires fix.
There are different approaches with detailing where you either do detailing before the upscaling/hires fix, where you do it after (like here) or where you do one with bigger denoise BEFORE upscaling to fix anatomic issues and then another one after everything is done with a low denoise to touch up on wanted areas.
When i made this workflow i took into consideration that nowadays most pony/illustrious/SDXL checkpoints will not need major anatomy fixes. Another reason is that upscaling will inevitably introduce artifacts, which i also want to eliminate with detailing. Last reason was also the introduction of hires fix, which will re-sample the image anyways and mostly fix major anatomy issues (depending on denoise value ofc). So if detailing is done BEFORE the upscaling/hires fix it'll mostly just be to fix major anatomy issues instead of actually upscaling/improving the body part for the final result.
One way to achieve what you want to do could be to not use upscaling or hiresfix in the txt2img workflow and do the detailing there, then use that picture in the img2img workflow with upscaling and/or hiresfix to finalize. I know that's not the ideal approach to switch workflows but i think for now that's the way to achieve that.
You could add another upscale node(and leave the current one bypassed) after the detailer and feed that into the hiresfix node instead. This way the detailing will happen first and then it'll run into the upscaler and then into the hiresfix if you'd prefer using the detailer to fix anatomic issues.
I will see what i can do to maybe optionally move the detailing pre-upscale.
@vslinx I agree with you, honestly i didnt come across any issue until i had to use an older model of illustrious(hassaku style A) because it produced much better cartoon(d**ney) style but with a caveat that it often had terrible fingers or missing even with positive and negative prompts.
Even with hires fix it didnt completely fix the anatomy, I didnt want to use too much hires denoise because i was very satisfied with the result for everything else. So i had to use detailing to get it fixed, however with detailing being done last it changed the image lighting just on the fixed part and didnt match with rest.
Which led me to thinking why detailing was done after everything else, thus explains my previous comment. Though with your explanation i can see why, because for most use cases it works perfectly and produces results.
Thanks for the detailed reply, also i think its best if you DONT change the flow and leave it as it is because it works perfectly fine for most of the times. I can just feed the image into img2img workflow and hires and upscale there.
@tiru92 yeah i gotchu, some of the older illustrious checkpoints still had some issues :/ mostly because they were overtrained. Sometimes i used SDXL loras like the detail tweaker to fix it since it doesn't have an inherited style bias: https://civitai.com/models/122359/detail-tweaker-xl
You could try to increase the denoise of the hands and explicitly prompt what you're trying to do with the hands, that usually really helps. If you're trying to do a peace sign for example you could prompt "v sign" into the hands prompt. I never recommend actually writing "hands" since in no dataset that is ever trained in any checkpoint will there ever be hands explicitly tagged, so what usually works really well for me is to prompt "fingernails" since it's often extra prompted if they're prominent. Through denoising with a higher value (0.38-0.5) you'll usually get good fixes this way.
If the major problem was a unmatching color you could try using a color fix again on the final result like i did down in the "Color Fix"-Group or increase the feather of the detailer, it might fix the issue with wrong colors.
@vslinx Thank you for the advice, i will be sure to try that fingernail prompt and lora a try. Any advice on how to get both hands detected? There have been times detailing only detects one hand and not the other.
@tiru92 that is sadly always completely dependent on the detection model you're using.
You can try lowering the sam_treshold/bbox_threshhold (depending on segm or bbox model) and see if that works. The threshold is responsible for the confidence cutoff where the detailer decides if that thing is still what it's trained on. Usually to leave it high to prevent false-positives, but you can try lowering and see if the second hand also gets detected.
@vslinx Sorry to bother you again, but i think the controlnet preprocessor in your latest txt2img might be broken. Your old version when i load the image in preprocessor the controlnet preview output is correct and the final results is reflected.
Your newer version doesnt take the input from preprocessor. Even the preview and results proves it. I slammed the controlnet values to max to prove it and it reflects.
You can see in the old WF the preprocessor image has twintails and results has twintails due to high controlnet values. The new WF results doesnt have twintails even though the high values meaning its not using the preprocessor image.
Attached screenshots for context. Use adblock if possible, https://imgbox.com/g/SZ59W9xnQF
Let me know if you cant see the link, in case its flagged.
Heya @tiru92,
no worries - questions never bother me :D
I have tried to replicate it but couldn't. I can clearly see in your screenshot that the ControlNet Pose Preview is indeed showing the loaded ControlNet Pose and is using that during ControlNet instead of a pre-processed version.
Have you activated the PreProcesser in the "IPAdapter / ControlNet"-Group? It's sadly too far left in your Screenshot so it's not in the visible area for me to confirm.
If you have activated it could you rightclick somewhere in an empty space select "Workflowm Image" at the very bottom and then "Export" > "png" and upload that image to mediafire or something? That generates a image of the whole workflow with the actual workflow attached so i can check what's wrong.
@vslinx My bad, didnt know i could share it like that, now i know. Here in the attached zip, i have 3 version. One is old working, one is new and not working, and the last one is brand new untouched workflow and its still not working. Also attached the controlnet poses i used just in case. I checked for errors as well, and comfy logs gave me nothing at all.
https://www.mediafire.com/file/xc2fyew3s98p99h/Workflow.zip/file
@tiru92 thanks for providing all the data!
After checking your workflow i noticed that even though you have Pre-Processing activated, all nodes inside the Subgraph are bypassed. I don't know if you've done this manually as you've also bypassed the Refiner (not necessary, unless you switch from Normal Sampler to Refiner sampler the functionality is not used and the switch actually happens in the Sampler subgraph) OR your ComfyUI for some reason is ignoring the state of nodes inside when bypassing.
You should actually be able to simply fix this issue by simply de-activating and activating the "PreProcessing"-Function again. Also make sure the frontend and comfyui versions are up-to-date to make sure that everything works the way it's intended.
I also recommend not bypassing things like groups manually instead of using the switches because the workflow is built around the switches and their groups content having the exact same bypass/mute state. Manually un-/bypassing nodes inside groups or groups completely can mess with their state inside comfyui, that's why i've implemented switches for everything that is optional - since they handle the bypass state for all nodes inside the group INCLUDING inside all subgraphs. It could also be that pinning a subgraph, like you did, has prevented it's content from being un-/bypassed in a previous version of comfy/frontend, this should be fixed by now though since i couldn't reproduce that with the newest comfy&frontend version.
Here you can see the subgraph (clicking the top right icon). Here the nodes inside are bypassed even though the subgraph is not.
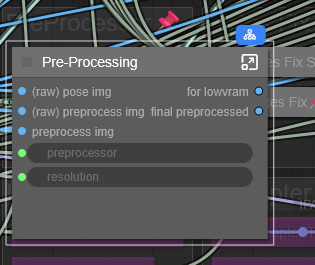
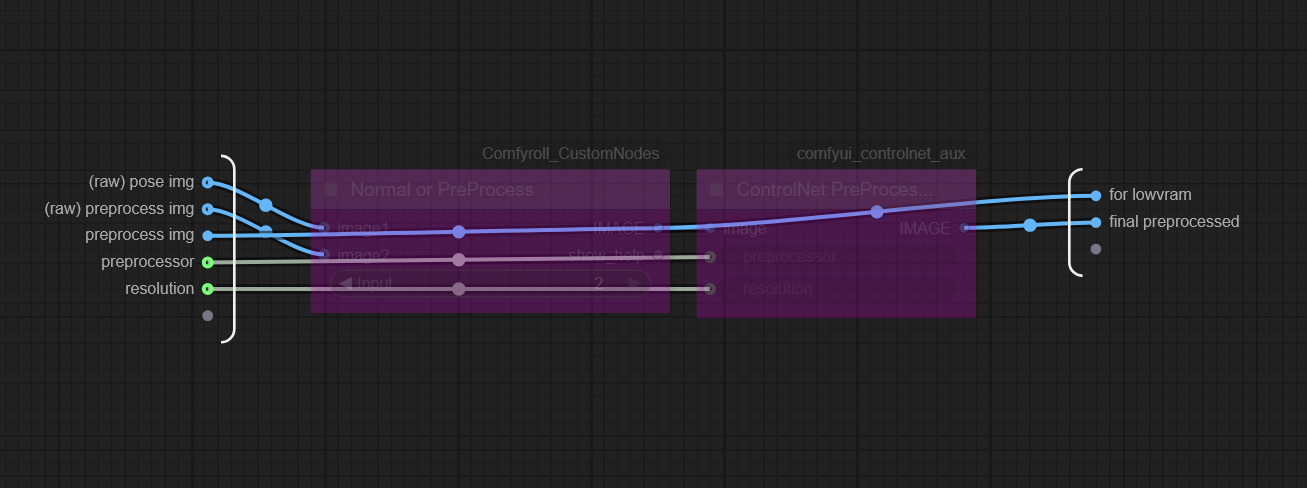
TL;DR:
Should be fixed if you simply press the "Enable PreProcessing" again to deactivate/bypass them and then press it again to activate them all.
@vslinx Thanks for helping me figure out the issue regarding the controlnet. I manually disabled the refiner section since i wasn't using it. Regarding deactivating and reactivating, it didn't work since the nodes inside the subgraphs remain bypassed and i did not disable those.
Just for the sake of my sanity i downloaded a new workflow again, enabled controlnet and preprocessor. Got into the subgraph and found the nodes inside are still bypassed even though i have enabled them. This is the same for low vram controlnet subgraph. However the other subgraphs are not the same, like the hires fix or color fix the subgraphs inside are not bypassed out of the box.
Im curious if the subgraphs are supposed to follow the bypass you set to the nodes outside, if it is then my frontend is probably bugged. If i bypass a node outside like hires and color fix(these came turned on by default, so the subgraphs were not bypassed to begin with) the subgraphs inside will not be bypassed.
I have already updated my comfyui, including the frontend.
@tiru92 no biggie!
if you manually bypass just the subgraph, does it's contents get un-/bypassed equally just like the subgraph itself?
I just did the same - downloaded the workflow from here, threw it in my own comfy instance and in my test instance that is newly generated every time i call it and in both cases using the bypass node as well as manually bypassing something it always also bypassed its content, as that is also the default behaviour (as of right now 0.3.56).
You could try by disabling the sampling subgraph, in there are 2 groups of which 1 is always bypassed (refiner), it'd be interesting to see if it bypasses it's contents or enables everything/disabled everything OR maybe preserves the initial state of one being bypassed etc.
It really does seem like your comfy seems to be bugged if manually bypassing and bypassing through the switches have the same behaviour of not changing the bypass status of it's nodes inside. I'd actually prefer if that'd be how subgraphs work since it'd be easier to write features around this behaviour :'D but right now that's not how they're supposed to work at least.
If the manual bypass behavior works and everything inside is also being bypassed it's very likely that your rgthree custom_node is either not updated or bugged, it'd be worth uninstalling the node and reinstalling it then. Otherwise if both the manual as well as the functional ones work the same it does seem like either your comfy has some issues OR another node you have installed is overwriting/interfering with the default behavior of this functionality :/
@vslinx i think you can officially call me dumb. So turns out my rgthree node was not updated, now its working as intended. Sorry for wasting your time. Ughh i feel so stupid. Thanks for helping me though, greatly appreciated.
@tiru92 all good haha :D
Sometimes it's easy to miss the most obvious problems/solutions when you're looking at a lot of variables 🫡 Glad that it's working now and that it only was something as simple as an outdated node instead of a comfy bug! ♥
I noticed you have "custom scripts" installed, could you be an absolute lad and export/upload a "Workflow Image"? (Right click>Workflow Image>Export>PNG) It would let me get a full detailed view of your workflow, without having to install all the custom nodes, so I can decide what I want, vs what isn't necessary.
Hey slaad0,
sure no problem :)
Here is it for the TXT2IMG Workflow: https://www.mediafire.com/view/qge1j9w4kgqpjah/workflowTXT2IMG.png/file#
Here for the IMG2IMG Workflow: https://www.mediafire.com/view/abcgts768t6zumb/workflowIMG2IMG.png/file#


There's also preview images of the nodes more closed up here in the model page.
The next version is coming soon which will have most nodes cleaned up into the new comfyui subgraphs to hide most of the technical stuff that doesn't require user input and isn't customizable.
Thanks!
Why does it produce 9 images in feed and how do I turn it off?
Hey cynseok,
the feed shows every single image created during a workflow. Meaning that every process during the workflow that generates any kind of image will show up in the feed - including the upscaling and detailers.
I can recommend disabling the feed completely in the settings as it‘s an old and flawed system that most don‘t use anymore since more complex workflows with more than just one sampler will always generate multiple images throughout the process.
Otherwise you should also be able to limit the images shown in the feed to only images that have been saved. You have to check your comfy settings for that - try searching „feed“ in the settings menu.
Hi, is my first time using ComfyUI, and I really appreciate the workflow you shared, and the amount of details you included with it! I was curious if within the workflow itself, a secondary checkpoint can be added as a refiner. I use secondary checkpoints in Swarm and Forge to refine the final results, and wanted to know if it's possible to do here as well. Thanks in advance!
Hey dNerop,
thank you for the feedback and i'm glad you're enjoying the workflow! 🥰
As of right now a refiner is not part of the workflow. Mainly because i want to keep it as (somewhat) simple as possible and adding a secondary checkpoint means i'll have to also give options to inject lora's into that and have to do a lot of background calculation for the steps and add controls to determine how much of the process is being done in the first sampler and how much in the second etc.
Then there'd also be the issue of compatibility as some user's like to use SD1.5 or even Flux checkpoints for refining, which this workflow does not offer.
All in all i don't really feel like refiners do much since SDXL 1.0, a few users have done tests on how well refiners perform after the update from SDXL 0.9 to SDXL 1.0 and usually the results are either minimal or even negative. (see here for example)
Since Illustrious and Pony are based on SDXL1.0 i don't see too much of a benefit that would justify all the extra knobs and background modules to implement it :/ but i can recommend trying the hi-res fix. While it does not split the sampling process in two, it does increase the quality by denoising the previous input and if you want to, you can go down in the workflow into the HiRes Fix Backend and connect a different checkpoint if you'd prefer to do that with a different one than the original.
If you need some more help with comfy or with the workflow you can always ask :)
I also wrote a guide for the (IMG2IMG) workflow, but it largely also applies to the TXT2IMG in it's functions and usability. You can find it here: https://civitai.com/articles/15480/img2img-comfyui-all-in-one-workflow-guide
vslinx <3 Much appreciated the fast reply! I'll give it a read and see what I can do. From my personal tests, and works with SwarmUI and Forge, using a refiner model helped me get a different style, like mixing contrasts, adding more "anime" detail into a 2.5d model and giving it a semi-realistic feel, but still looking anime'ish. I'll ask more for sure <3 Now I'm trying to find the right settings to have the body/face look normal haha
dNerop no need to thank me! :D
That might be something you'd have to try to accomplish with a LoRA then maybe if you want to use the workflow :/
Otherwise i also quickly whipped up a version for you that has a refiner, you can download it here: https://www.mediafire.com/file/u8nrxarpl49eqsm/TXT2IMG-ADetailer-v4.3%252Brefiner-vslinx.json/file
At the top you'll find a "Refiner" area, where u can select a secondary checkpoint + lora selector to add as many for the last few steps as you want.
The "Steps spent on the Base" will determine when the 2nd Sampler(Refiner) will take over. So make sure you have your Steps and the Steps spent on Base set correctly.
I wouldn't implement it like this into my workflows as of right now because i'd want to make sure that you can enable/disable the refiner and switch between the correct samplers accordingly, the version i made for you only works with the Refiner enabled, so you can't switch it off.
Amazing work, and you work fast, dayum :x <3 I'll test around with both, and I'll share some of my results as well. P.S.: love how specific you are <3 much appreciated!
thank you dNerop ! 🥰
I'll try to be efficient (sometimes) 🫡
And always appreciate people sharing their work with the workflow! It looks amazing! Thanks a lot ♥️🙏
Really love your workflow and explanation about comfy ui. It works perfectly.
I'm just wondering 2 things :
1) How to Prompt S/R quickly (X/Y)?
like red | blue | green eyes.
2) Do we need to manually change the node link for VAE (in case the model has baked VAE) ?
Hey sunioyu,
as oft right now there is no implemented dynamic prompt node to do the typical {red eyes| blue eyes|green eyes} prompting. I can see how conveniently it's implementable and check if that's something i'll add for the next version!
Currently if you have a VAE baked into your model it should be enough to connect the VAE of the model loader into the "Checkpoint everywhere"-Node in the Backend. I'll add a "Baked in"-boolean for the VAE for the next version - thank you for the feedback!
vslinx Thank you for your answer. Really nice stuff!
Firstly, this is such an incredible workflow, this must have taken a painstakingly long time to construct with a lot of trial an error. Thank you for providing this to the community.
I have a few questions, or maybe requests if it's not currently supported, I hope you don't mind me asking.
1. I love the opt-in part of progressing to the detailers and upscaler. One thing I was wondering is if there was a way to toggle it to bypass? For example if you wish to just bulk generate bulk images and upscale them anyway. Is this possible?
There's also a 'sound/bell/ding' sound it makes which I wish I knew how to turn off sooner. I couldn't find anything in the guide on how to disable that.
2. I think I saw another similar comment mentioning this, but is wildcards supported? In particular a file based wildcard system where something like --colours-- (pretend these are underscores) will select randomly from a colours.txt file?
Heya PokieFish,
Thank you for the feedback! It was indeed a long process, but seeing the community enjoy it makes the effort worth it! 🫡🥰
I think i don't quite understand #1, do you mean to bypass the image selection process in the txt2img workflow? or to create multiple images in the IMG2IMG workflow?
If you want to generate batches of images in the TXT2IMG workflow you can increase your batch size, deactivate all the detailers and only leave the upscaling on. If you want to bypass the image selection before the processing starts you can go down into the "Backend - Model preperation"-Group and either Bypass the "Image filter"-Node or delete it completely. You can also open it, change timeout to "1" and then "on timeout" to "send all".
If you want to use the IMG2IMG Workflow only upscale you'll sadly have to wait for the v4.4 release, there you have a new node i developed to load multiple images at once instead of selecting solo images etc.
To disable the sound you have to go into the comfy settings and then to Image filter and deactivate "Play sound when activating". It's not in the guide because the guide is only for the IMG2IMG workflow and there the Image-Filter is not in use ^^
To #2 i can say that the v4.4 i'm working on right now will have dynamic prompts/wildcards implemented, including being able to choose from your preset-files. The file format/folder directorys will be from Impact-Pack, so this will be the logic of how it's implemented:
https://github.com/ltdrdata/ComfyUI-extension-tutorials/blob/Main/ComfyUI-Impact-Pack/tutorial/ImpactWildcard.md
Thanks for replying, @vslinx! 🥰
> You can also open it, change timeout to "1" and then "on timeout" to "send all".
That should do it, I'll see if I can set that up 👍
> v4.4 i'm working on right now will have dynamic prompts/wildcards implemented
Woooo! Can't wait, thank you! 🎉
workflow is perfect but i'm not sure which node edited the image because the image is not the same as the prompt i wrote, you can add the positive part checked select to lora to add to the text to make it more concise, thanks for the workflow
hey @MikeyArtis the positive prompt in TXT2IMG is simply "Positive"(+ start/end quality prompt if activated). In IMG2IMG if u have transfer activated it's the "IMG2IMG prompt" field.
If you're using IMG2IMG and have the transfer activated, the original will be checked and the prompts of the original will be copied into the image. You can always check your full prompt in the "Preview full prompt"-Node in the "Debug"-Group below the previews.
@vslinx I mean the "positive" node with the Lora add-on to add text
I'll send you my edited workflow, I haven't figured out how to make the image right yet. I'm still learning but your workflow is awesome
https://drive.google.com/file/d/1wglskYkmzjGJRct9WjhnPjA7S0THslPb/view?usp=sharing
thanks
@MikeyArtis now i get what you mean! And i'm glad you're enjoying the workflow! ♥️
You can already add Lora's by text if you want, i sadly will not switch to the impact-pack nodes because they're overwhelming for new users. The next version (4.4) will support dynamic/wildcard prompts though so you'll be able to add files or wildcards to the prompts.
The reason why your image is not generating the way you want right now is because you're combining positive and negative prompt right now.
Meaning your full prompt also has your negative prompt in it. To fix this just connect the clip and "populated_text" output to the "prompt convert"-node instead. Then do the same with the negative to the "prompt neg convert". (You also have to change the model and clip order, but i've done this in the file below for you)
I have done this for you here:
https://drive.google.com/file/d/1p9WRzxZpcKy3kAiXJundIdzBdyhKIQrp/view?usp=drive_link
@vslinx I have sent a request to view the file, thank you very much for your enthusiasm.
@MikeyArtis sorry, forgot to change file permissions - you should now be able to download it.
And no need to thank me :)
@vslinx it works great my friend it gives the same style as what i did on automatic1111ui
@MikeyArtis nice! I'm glad it's working! 🫡♥️
I know the switch from a1111 to comfy is hard and i hope this workflow will make it a tiny bit easier ^^
and thank you for the tip! ♥️
@vslinx yes it's brand new , glad you support me ^^
Is it possible to run this workflow with SDXL on only 8 gb vram / 16 ram?
@Diemonde i have tried it with 16GB reserved, meaning only 8GB VRAM available.
It worked but obviously it was significantly slower. For the more VRAM heavy tasks(ControlNet & IPAdapter) i have implemented Low VRAM options to pre-downscale the input images for these.
I know of at least 1 other user that is actively using this workflow that has a 8GB VRAM Graphics Card but he has more RAM, so i'd say you should give it a try. If you're running out on memory on any of the tasks in the workflow you can let me know where that happens and i can give you some parameter changes that will decrease VRAM load. If you have triton installed you can also activate the Sage attention patch in the workflow which saves a bit of vram.
@vslinx thank you for your reply and this workflow, only an absolute genius could build a massive and detailed workflow like that :)
@Diemonde no need to thank me! and thank YOU for the kind words haha
i guess it's more of being an idiot with a lot of trial and error though
Got a weird roadblock. When I press the button to generate an image, the sampler and scheduler node at the bottom of the workflow get a red box around them and nothing else happens. I checked and they're connected to everything. Not sure whats going wrong here :(
Hey @CitizenKing, does this happen on the txt2img or img2img workflow?
It could be that you‘re having the wrong image-saver custom_node installed. There is an old one with the same id that hasn‘t been updated in 2 years and therefore is deprecrated. Make sure you‘re using the right one from the description/guide/workflow-note.
If the issue still persists can you send me the log of your console?
@vslinx Nevermind, it was a ComfyUI issue. Reinstalled and now its working fine, thanks!
Hi, I just installed the workflow and I'm getting this error:
Missing Node Types
When loading the graph, the following node types were not found:
workflowControlNet Models
workflowIPAdapter Models
When I click on "Install Missing Nodes," none appear. I've already restarted and refreshed ComfyUI, but it doesn't seem to be fixed. Does anyone know what I should do to fix this?
Hey @fernanthecreator,
usually this only happens if you don‘t have all the nodes installed. Namely you‘re missing the ControlNet and IPAdapter nodes. Please check your console if none of them say (IMPORT FAILED).
If they do please check the instructions in the guide at the very bottom under the FAQ.
That should solve it.
Hi, this looks like a verry nice workflow.
I can't use it beacuase of an error i get installing nodes from Comfyroll Studio
Using an outdated version has resulted in reported issues with updates not being applied. Trying to reinstall the software is advised.
Even tried is with a git pull command in the custom nodes dir.
Any idea what i can do to fix this
Hey @warsound75,
seems like that's an issue with ComfyManager - i guess you have tried installing it through ComfyManager?
It's probably an issue with a version issue between your ComfyUI, your Frontend Version and/or your ComfyManager.
I recommend doing a "git pull" in your comfyui directory to update comfy, a "git pull" in your ComfyManager directory to update the manager and to add "--front-end-version Comfy-Org/ComfyUI_frontend@latest" as a parameter where you start comfyui (so probably "python main.py --front-end-version Comfy-Org/ComfyUI_frontend@latest").
If you don't want to update everything you most likely have to install Comfyroll manually without the manager. To do that simply remove the comfyroll folder in your custom_nodes folder, enter the custom_nodes folder through your cmd/terminal and do a "git pull https://github.com/Suzie1/ComfyUI_Comfyroll_CustomNodes.git"
That should do it :)
@vslinx I got a bit further. Only error i'm still getting is
CR Image Input Switch
CR Text Concatenate
Nodes are still missing
@warsound75 it seems like your ComfyRoll might be installed but not working.
Does your console say "(IMPORT FAILED)" where ComfyRoll is being loaded?
Try opening your ComfyUI-Manager, go to Custom Nodes Manager and at the top left switch the filter to "Import failed", then if comfyroll pops up there click "Try fix", once it's done you can restart comfy and refresh the browser window where comfyui is loaded(even if you had closed it etc, reload regardless).
@vslinx Installed another instance of comfyui, seperatly from the old one. in the second comfy the workflow installed all nodes. Ill download some models that are needed and try the workflow. Thx for the help so far
@warsound75 alright, sounds good! let me know if something‘s not working or you‘re missing something :)
Hello. I just installed this workflow and got a missing node error. It is the Resize Image node from rgthree. The thing is rgthree in my Comfy instance is already up to date and working normally. So what am I missing here?
hey @richardwolf99,
does it say "(IMPORT FAILED)" in the console when it loads rgthree?
If yes please follow the instructions in the guide under FAQ here: https://civitai.com/articles/15480/img2img-comfyui-all-in-one-workflow-guide
I just set up a new instance, installed all custom nodes and downloaded the workflow and it's working without issues for me. Are you running rgthree version "nightly 1.0.25082416"?
It could help to maybe delete it in the custom_nodes folder and to clone the rgthree node into it again and then going into the folder manually and to execute "pip install -r requirements.txt"
@vslinx Thanks for the quick reply.
Manually deleting rgthree and then cloning it fixes the error. Thank you for the help! Gonna test this workflow now and see what it can do.
@richardwolf99 nice! sometimes Comfy-Manager can cause hiccups with bigger version jumps during installation/updates.
Let me know if you're missing something or have feedback :) enjoy!
Hello. Even though I turned on "Enable Face Detailer" to "Yes," the face in the image is still blurry. I also installed ADetailer Anime Girl Face Segmentation. It seems like it can't even detect it.
And when I create the image, it's not in the output folder, where is it?
hey @dlguddn119,
if there is no image in the output folder, it means that the detailing wasnt bypassed and failed - probably because of a missing model. Can you make sure you have the right model selected and check your console for any errors. You can also check the „Face“-Node in the Detailer Debug-Group and see if that preview image is completely black etc.
the detailer nor the high res fix nor upscaler seem to be working at all.
@arkhin1247 you'd be the first to experience that issue, have you selected models for the detailers and/or the upscaler? can you check your console that's running comfy for errors?