


This is a Layout I did to upscale images with High quality, my purpose here was to increase the quality of 4x upscaling preserving as much of the original image I could and above all avoiding weird distortions on the process.
This is a work in progress, I would love to see some feedback and tips to make it better!
The idea is to pick an element, give it details as much as I can without weird artifacts or extra stuff on the final image.
This process as is it's very heavy, takes around 4 minutes to generate the final image and requires a lot of VRAM, change the settings to get something faster, note that for consistency I left the upscale size, upscale height and width in big values, this helps the upscaler to understand better the elements inside of each of the blocks upscaled, if you decrease the values, consistency will also decrease.
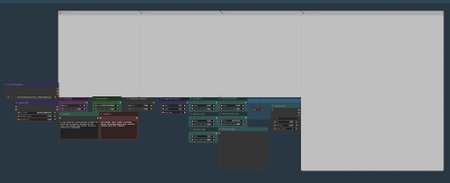
There are two files, the Super Simple Upscaler, this is for begginers that want a decent upscaling without having to mess around too much, you will have very consistent results with this one just by changing the seed and the promtps and a few extra nodes if you know what to do with them, just find the "change here" part and that it is.
If you want to do some fast inpainting work, just connect the rerout socket to the node where it's written connect me and add a text to that node, this text will search for the element you want to change in your scene and it will do it for you automatically.
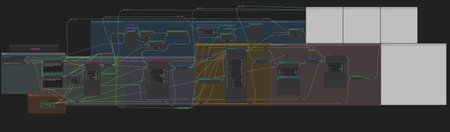
The other FIle is the Advanced file, if you know a little more about how Comfy works there is the complete node setup, by far this is the best setup I made and it helps keeping the generations consistent while it adds plenty of details.
you will need the following nodes in order to use this workflow:
Manager
ControlNet preprocessors
ClipSeg
Comfy clip blip node
Ultimate SD Upscale
Small tutorial:
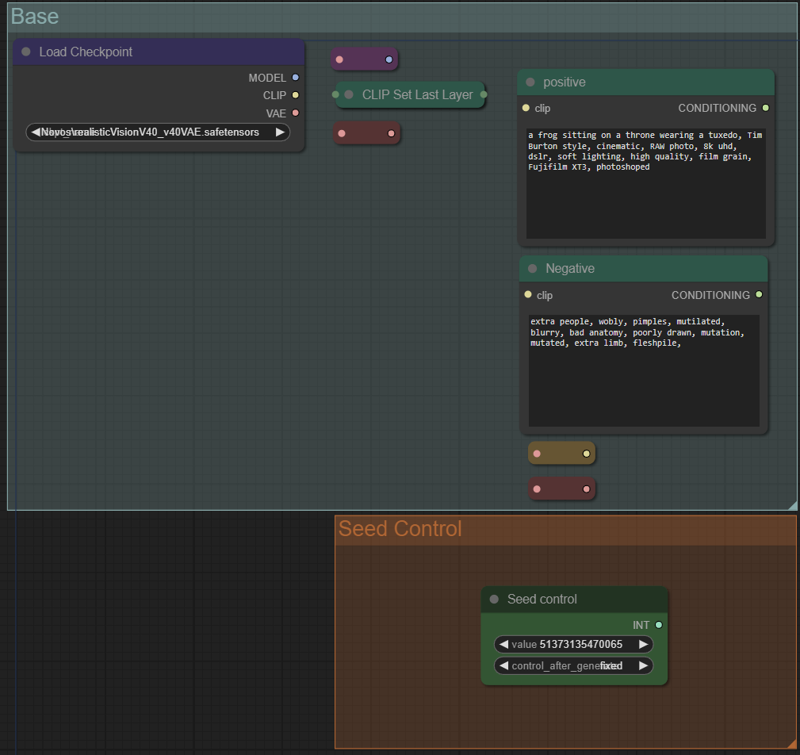
First change the models, prompts, Clip skip and seed control:
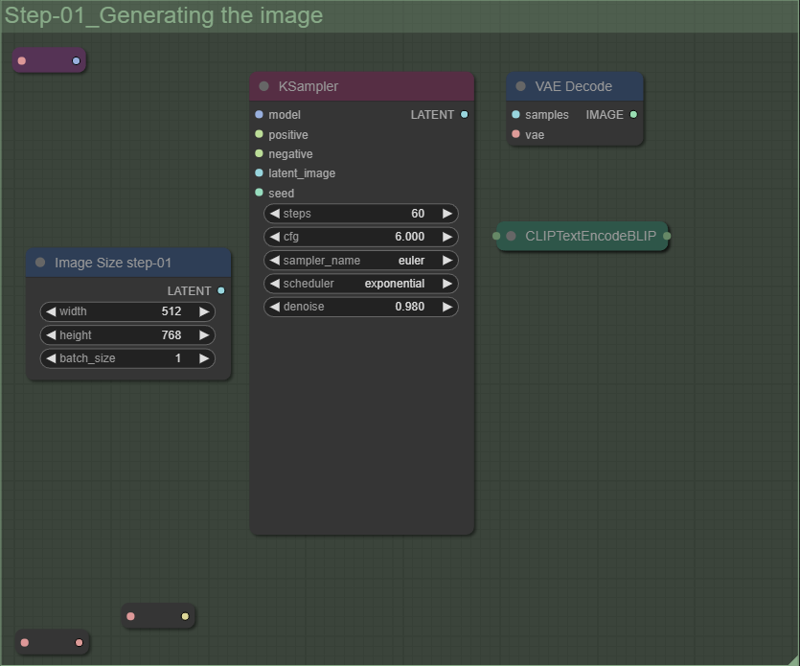
Here we generate the first image.
Here we try to add details to the base image while keeping everything consistent
Here is the upscaling part, if you change the "Adding details" node you will increase the details on the upscaled images through a Canny controlnet.
On the Ultimate SD Upscaler you can decrease the upscale size if you want but lets talk about the real important things:
The higher the Denoise Strength, better the new details will look, the problem is that it can change radically the image, the way I settled it up, it will work even with values around 0.8 with a medium consistency, but I recommend values around 0.4.
Another important thing for consistency is the width and height of the tiles, Bigger the size you use here, better will be the overall consistency because when the tile ends it may get the Model confused, for instance, you made an anthropomorphic frog wearing a tuxedo, if the tile ends right below the mouth, the tile underneath it will see something resembling a head and may add a human chin or things like that, so try to avoid these tile issues.
Seam fix mode is very useful, the problem is that it seems that it doesn't follow the sampler you use, thus it denoise differently and it may change the original shape, I recommend seam fix to none or Band pass, but remember to change the seam fix width.
If you are making structures you can use half tile + intersections, this one remove the seams completely and the results are often great, but keep in mind that this will make the renderings take even longer and for characters it may break consistency.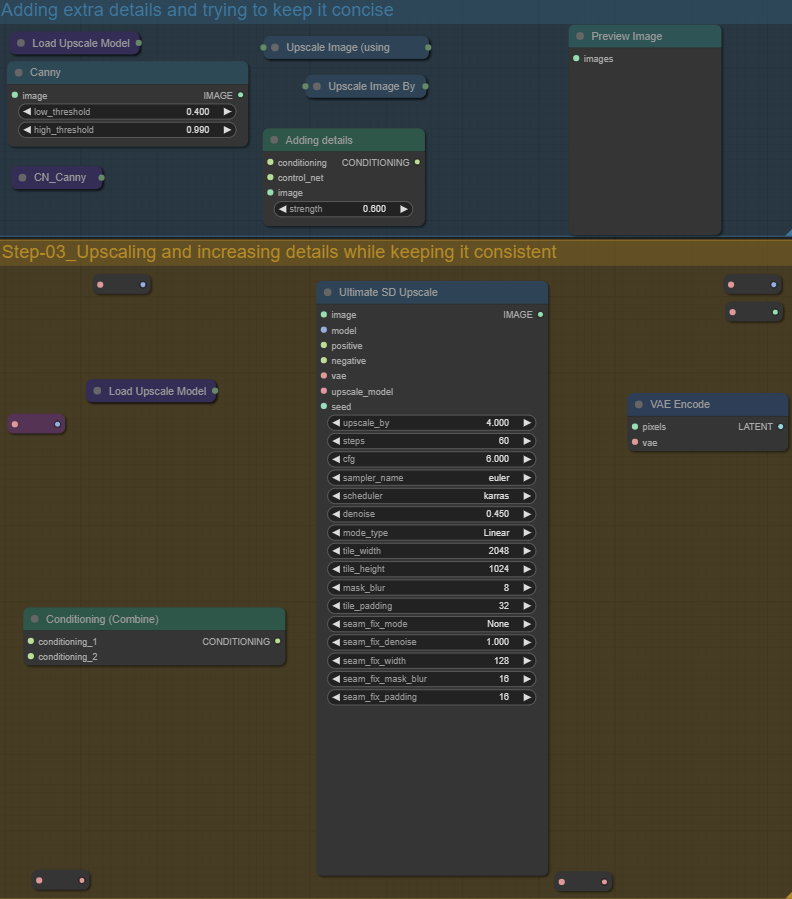
And if you want a fast inpaint just connect the rerout to the samples on the set latent noise mask node and put a text on the clipseg about the thing you want to mask and change.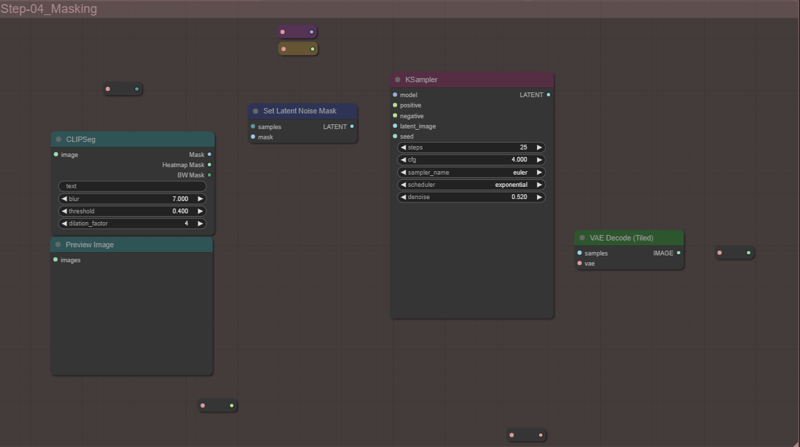
Description
FAQ
Looks like we don't have an active mirror for this file right now.
CivArchive is a community-maintained index — we catalog mirrors that volunteers upload to HuggingFace, torrents, and other public hosts. Looks like no one has uploaded a copy of this file yet.
Some files do get recovered over time through contributions. If you're looking for this one, feel free to ask in Discord, or help preserve it if you have a copy.